Whether you proceed with car window tinting or not is hardly an aesthetic choice; it is an optimization of your driving conditions. An installed window film has several practical purposes: it helps to minimize thermal gain in the cabin, helps to reduce the destruction of interior materials by ultraviolet radiation, and improves privacy. Although there are professional installation services, the labor expenses are usually very high when compared to the material costs. Thus, the Do-It-Yourself (DIY) strategy has a strong economic argument.
Nevertheless, the effectiveness of a DIY installation is based solely on the compliance with the processes. Tinting windows is not an art, it is a science that is controlled by the material characteristics, thermodynamics, and strict surface preparation. This guide is a systematic approach to professional grade results, reducing the error margin by using accurate technique and material choice.
Choosing Your Film: Material Types and VLT Explained
Before any physical work begins, one must select the appropriate substrate. Not all window tint film is created equal; the market is segmented by manufacturing technology, each offering distinct performance characteristics regarding durability and heat rejection.
Material Composition: A Comparative Analysis
1. Dyed Film: This is the low-end version. Light is absorbed by adding dye to the polyester layer. Although it is the cheapest in the short run, it is chemically not stable in the long run. The dye eventually degrades, becoming purple or fading, with exposure to UV and its heat rejection properties are low. It is used to provide opaque rather than thermal efficiency.
2. Carbon Film: These are a step higher in the hierarchy with the infusion of carbon particles into the films. The material is not color sensitive and will not fade. Carbon film has a unique matte finish and has moderate heat rejection, blocking a fraction of infrared light. It is a compromise between functionality and beauty.
3. Ceramic Film: This is the latest pinnacle of tint technology. These movies have non-conductive ceramic nanoparticles. Its main benefit is spectral selectivity: ceramic films can be transparent (high visibility) and still block large portions of solar energy. They are the most durable and have the best heat rejection with no interference to electronic signals (GPS, cellular data) like the older metallic films.
Deciphering the Parameters: VLT and IRR
When deciding on the specific type of tint, you will encounter two critical metrics:
- VLT (Visible Light Transmission): This percentage indicates how much light passes through the glass. A 5% VLT (often called “limo tint”) allows only 5% of light to enter, creating near-total privacy. A 50% VLT is much lighter. This metric determines the cosmetic appearance and visibility.
- IRR (Infrared Rejection): This measures the film’s ability to block heat-carrying infrared waves. It is crucial to understand that VLT and IRR are not strictly correlated in modern films. A high-quality ceramic film with a light 70% VLT can possess a higher IRR (better heat blocking) than a cheap dyed film with a dark 5% VLT. For thermal comfort, IRR is the governing variable.
Legal Limits: Understanding Tint Laws in Your State
Regulatory compliance is a non-negotiable constraint in the tinting process. Every jurisdiction maintains specific statutes regarding allowable VLT to ensure law enforcement visibility and driver safety. Ignoring these constraints creates a liability that can result in fines or a mandate to remove the film.
The AS-1 Line
In the case of the front windshield, the regulations are very strict. In most states, tinting is limited to the upper section of the windshield, as far as the AS-1 Line. It is a mark that is frequently stamped on the glass by the manufacturer, about 5 to 6 inches above the top. In the majority of jurisdictions, tinting below this line is unlawful except in the case of medical waivers.
Regional Variance and Window Classification
There are three areas of the vehicle that are distinguished by laws:
1. Front Side Windows: These are the most controlled ones so as to make the driver visible. The limits are usually between 25 to 70 percent VLT depending on the state.
2. Rear Side Windows: Rules in this area tend to be looser and darker tints (lower VLT) are permitted.
3. Rear Windshield: Like rear side windows, lower VLT is typically allowed, although the vehicle must have dual side mirrors.
To prevent the waste of rework, check a current database of state tint laws or a VLT limit chart to buy your material. Do not think that a film is sold and it is road legal in your particular area.
Preparation: Tools, Workspace, and Cleanliness
The environment in which you work dictates the quality of the outcome. A controlled workspace is essential. Wind, pollen, and airborne dust are the primary causes of installation failure. An enclosed garage is the optimal setting.
The Essential Tool Inventory
Attempting this process without the necessary tools is a false economy. You will need:
- Heat Gun: Required for shrinking the film to match the curvature of the glass. A hair dryer lacks the thermal output required for this task.
- Lint-Free Cloths: Microfiber towels are standard, but ensure they are strictly lint-free.
- Squeegees: You need a variety—a heavy-duty squeegee for cleaning and a “Turbo” or “Blue Max” type squeegee for water extraction.
- Hard Card: For tucking film into gaskets.
- Snap-off Knife: Specifically with Stainless Steel Blades. Carbon steel can rust or be too brittle; stainless steel is preferred to avoid scratching the glass.
- Spray Bottle: Filled with a slip solution (water mixed with a specific ratio of tint slime or baby soap).
- Scrub Pad: A white (non-abrasive) scrub pad for glass cleaning.
Note on Pre-existing Conditions: If your vehicle already has an aftermarket film installed, you cannot simply layer over it. The substrate must be returned to raw glass. Existing tint must be removed first. Check out our guide on [How to Remove Old Window Tint] for a clean slate.
The Process: How to Tint Car Windows Like a Pro
The following methodology is the industry standard for dry shrinking and wet application. It is designed to mitigate the two most common failure modes: creasing (due to poor shrinking) and contamination (due to poor cleaning).
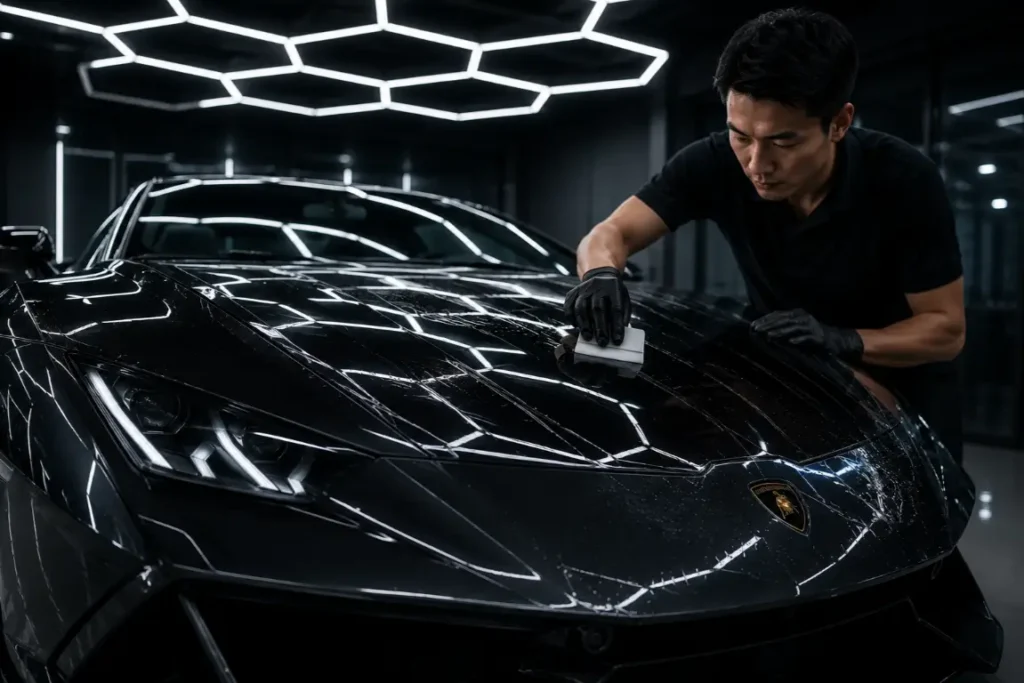
Step 1: Exterior Prep & Heat Shrinking (The Dry Method)

One of the counter-intuitive yet important ideas in window tinting is that the film is formed on the outside of your window before being placed on the interior. Car windows are curved, window film is flat. When you try to simply lay the flat sheet on the curved inside, the surplus material will roll up in groups of what are known as fingers and they cannot be flattened. To fit the polymer structure of the film to the geometry of the glass, we have to heat the film.
The “H” Pattern Anchor
1. Wipe the outside of the window.
2. Apply a solution to soap on the glass.
3. Place the film on the outer glass (liner side up).
4. Wipe the film with a squeegee in the form of an H: a horizontal line in the middle of the film, and then a vertical line on each side.
5. The Rationality: This anchoring technique pushes the surplus film (the “fingers”) to the bottom and top of the window. This is mechanically required since the window film is produced with a machine direction. It can only shrink well in the direction of the roll. You position the surplus material along the shrinkable axis of the film by pushing the fingers up and down.
Managing “Fingers” and Heat Application
Once the film is anchored, you will see zig-zag waves of film at the top and bottom.
- Set your heat gun to a medium-high setting.
- Start at the bottom of a “finger.” Apply heat while holding the heat gun about 4-6 inches away.
- You will observe the film reacting to the thermal input by zigzagging or “squiggling.”
- Immediately smooth the heated section down with a hard card or gloved hand.
- Critical Technique: Never keep the heat gun stationary. Stationary heat causes localized overheating, which burns or melts the polyester. Keep the heat source in constant motion. Do not attempt to shrink horizontal fingers on the sides; they will crease rather than shrink.
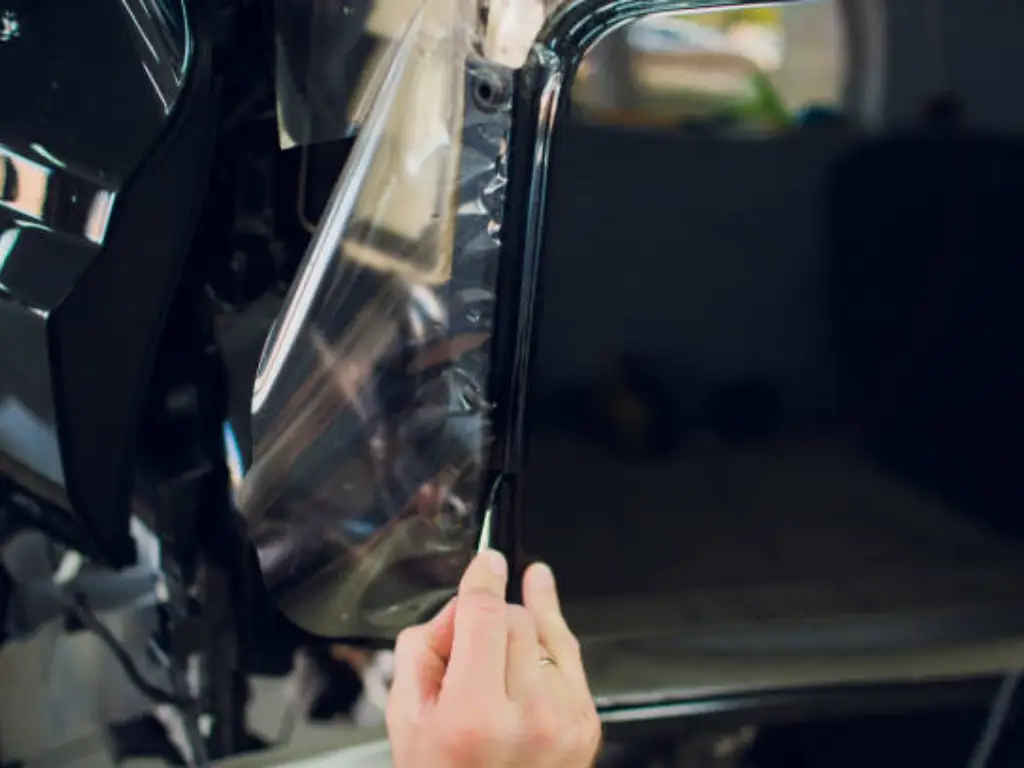
Step 2: Precision Trimming & The “Micro-Edge”
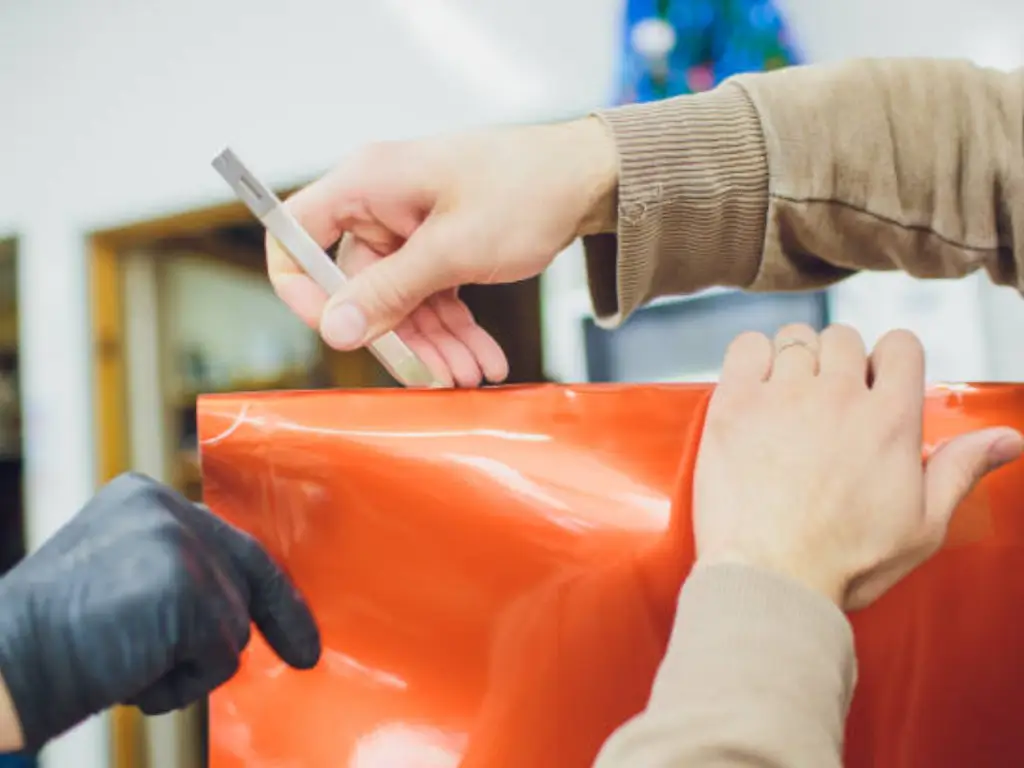
After the heat-forming of the film into the shape of the glass, it is necessary to cut it to the very perimeter using your razor blade. The gap between a professional appearance and a clear DIY one is in the upper edge.
The Micro-Gap Strategy
1. As the movie is still on the outside, roll the window down about two inches.
2. Follow the top of the glass using your knife. The idea is to leave a steady micro-edge – a space of approximately 1/16th of an inch (1-2mm) between the top of the glass.
3. Why a gap? When the movie is stretched to the very end to the edge, the friction of the window rolling up and down into the rubber channel will eventually strip the film back. This mechanical stress is alleviated by a small distance.
Rounding the Corners
Do not leave a sharp 90 degree angle on the corners of the film. Sharp edges are weakly adhesive and can easily come up when caught by a cleaning cloth or window seal. Make a small radius with your knife (round off the corner). This enhances structural life of installation. Always make sure that you have a new piece of stainless steel blade to avoid jagged cuts that will tear when used.
Step 3: Interior Deep Cleaning (The Two-Stage Method)

According to industry statistics 90 percent of tinting defects are due to dust between the film and the glass. The cleaning of the interior of the car glass should be vigorous and orderly.
Stage 1: Mechanical Decontamination
Spray your inside glass with your slip solution. Wipe the whole surface with a white scrub pad. This eliminates any invisible oxidation, sticker glue, and oil films, which cannot be dissolved by chemical sprays. Adhesion demands a clean surface.
Stage 2: The Flush (Hydrodynamic Cleaning)
This is the most that beginners overlook. The dirt is trapped by the rubber gaskets (seals) around the window.
1. Spray water heavily on top, sides and bottom gaskets. You wish to wash the dirt out of the seal, that it might run down the glass.
2. Squeegee the water off immediately.
3. Rinse the squeegee until the glass is dry.
4. Importantly: Do not use a towel to wipe the glass after the last squeegee. Towels introduce lint. Henceforth, the glass is not in contact with anything but the film.
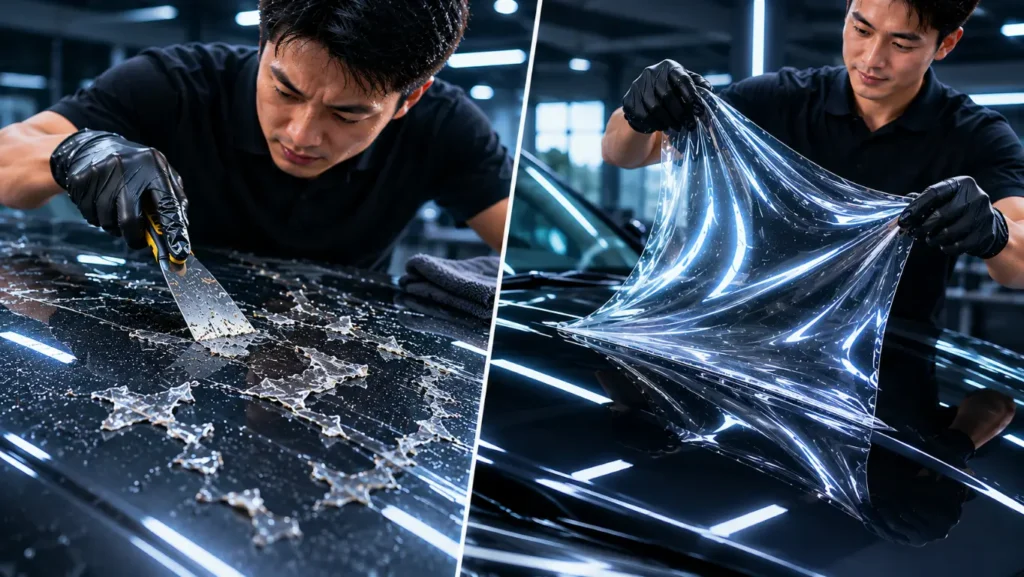
Step 4: Film Peeling & Application
This phase is time-sensitive. The aim is to move the film out of the exterior liner to the interior glass without gathering dust in the air or touching the adhesive surface.
The Peel-Board or Frankenstein Method
1. Place the film on a peel board (a large clean piece of glass) or do it on the outside of the car window in case it is clean.
2. Wet Hand Protocol: wash and wipe your hands. Oils and dry skin flakes are contaminants.
3. Start peeling the transparent protective liner of the tint. Peeling As you peel, spray the exposed adhesive with the slip solution.
4. Static Control: When plastic is peeled, it produces a kind of electric charge that is a magnet to dust. This charge is neutralized by the water spray and any dust particles in the air are encased before they can adhere to the glue.
The Transfer
1. Spray the inside of the car window again with slip solution.
2. Lift the film carefully (with wet fingertips) and put it on the inside glass.
3. The film will not be stuck instantly because the glass and the adhesive are wet. It floats. Fit it in, leaving that 1/16th inch gap at the top edge.
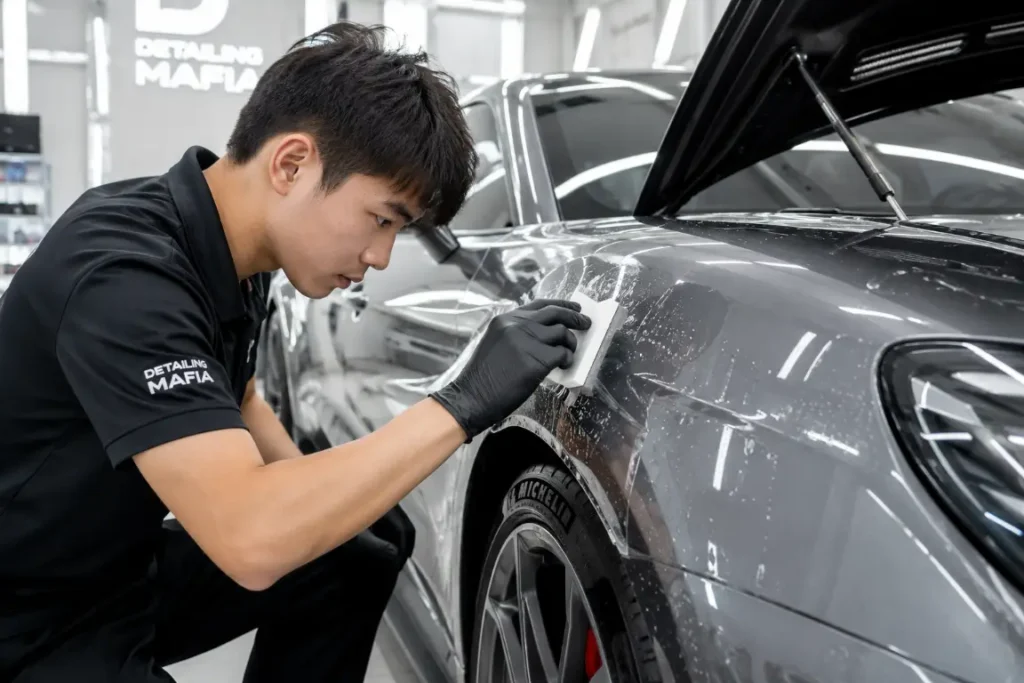
Step 5: Squeegeeing & Final Tack

Once the film is positioned, you must extract the fluid to initiate the chemical bond of the adhesive.
The Extraction Path
- Spray the face of the film (the side facing you) with a solution to lubricate your squeegee. This prevents the tool from scratching the film.
- The Cross Stroke: Make your first pass horizontally across the center to lock the film in place. Then, make a vertical pass down the middle. This creates a “T” or cross anchor.
- Quadrant Extraction: Work from the center outward. Push the water out toward the edges.
- Overlapping Strokes: Each squeegee pass should overlap the previous one by 50%. If you leave gaps between strokes, you leave pockets of water that will turn into unsightly bubbles or “water blisters.”
Edge Sealing
Wrap a lint-free cloth around a hard card / hard squeegee. Firmly press down the edges of the film, pushing the remaining moisture into the gasket or wiping it away. This ensures the perimeter—the area most vulnerable to peeling—is tight.
Troubleshooting: 5 Common Mistakes to Avoid
Drifts in variables may occur even with a robust process. The following are the typical deviations and their correction.
1. Temperature Extremes of the Ambient Temperature: Adhesives and polymers are also sensitive to temperature. When it is too cold (50°F / 10°C), then the film will be brittle, and the adhesive will cure too slowly. Exceeding 90°F (32°C) the slip solution evaporates before you can place the film. Working range is approximately 60°F to 80°F.
2. Dust Contamination: When you notice white spots under the tint it is dust. This is normally occasioned by the fact that the adhesive was touched, the door panel brushed against when being transferred or the individual works in an area that is drafty. They cannot be erased after the movie is shot.
3. Creases vs. Air Bubbles: A round bubble is either water or air; it can be forced out. A sharp line is a crease. Creases cause irreparable damage to the film structure. They usually take place in the handling or shrinking process. Treat the film as a delicate membrane and not a sticker.
4. Premature Window Operation: Do not open the windows at once. The bonding material has a cure time during which it attains its peak bond strength. Premature use of the window may cause the film to move or remove it off the glass. Reminders are provided by recording on the window.
5. Curing Anxiety: The film may appear hazy or may contain little water pockets within 3 to 5 days after installation. This is moisture that is evaporating out of the porous film. Never bother to burst these bubbles; leave the physics of evaporation to it.
Cost Analysis: DIY vs. Professional Installation
The economic argument for DIY tinting is strong, but it requires a full accounting of costs. Professional installation commands a premium not just for labor, but for the overhead of a shop and the assurance of a warranty.
| Cost Component | DIY Project (Estimated) | Professional Shop (Estimated) |
| Material (Film) | $30 – $100 | Included in package |
| Tools | $20 – $40 | N/A |
| Labor | 0 (3-5 Hours of your time) | $200 – $500+ |
| Total Cost | $50 – $140 | $300 – $600+ |
The Analytical Conclusion: You stand to save significantly—potentially 70% to 80%—by performing the labor yourself. However, this calculation holds true only if the installation is successful. If you buy cheap film that creases easily, ruins the install, and forces you to buy a second kit, your savings diminish rapidly. Therefore, the most rational economic strategy is to allocate a portion of your labor savings into purchasing superior materials to ensure first-time success.
Why Film Quality is the Secret to DIY Success
In DIY projects, the skill gap between a novice and a professional is often bridged by material quality. A professional can force a low-quality film to cooperate; a novice needs a film that is engineered to be compliant.
Engineered for Easier Installation (Superior Shrinkability)
The heat-shrinking stage is the main frustration to DIY installers. The cheap movies are like hard plastic; they do not bend to the shape of the glass and bend easily. FlexiPPF is based on a high-quality polyester foundation that is obtained in Germany at BASF. This substrate is designed as high tensile strength and predictable thermal contraction.
This is mechanically to say that the film is more accepting of the shrink. FlexiPPF is able to adhere to complex shapes like rear windshields with much less resistance when heat is applied compared to regular films. To a first-time installer, this high shrinkability reduces the technical barrier to entry and minimizes the likelihood of creasing the film during prep significantly.
Factory-Direct Durability (Nano Ceramic Tech)
Longevity is the final variable in the value equation. Installing a film that fades in two years results in a negative return on your labor investment. FlexiPPF integrates Nano Ceramic Coating technology, which provides a dual benefit: it blocks 99% of UV rays and up to 70% of infrared heat, and it is chemically stable. We back this stability with a 10-year non-fading warranty. By sourcing directly from the factory, you access professional-grade ceramic performance without the markup of intermediary distributors, optimizing both the installation process and the long-term asset value.
Conclusion: Ready to Transform Your Ride?
Tinting your own windows is a challenging but achievable project. It requires patience, a clean environment, and a strict adherence to the process steps outlined above. By controlling the variables—cleanliness, heat application, and water extraction—you can achieve a result that rivals professional shops.
However, the most critical input remains the material itself. Do not compromise your effort with inferior components. If you are ready to proceed, ensure you are equipped with film that supports your success. Check our catalog for the correct specifications for your vehicle, or contact us to request a sample of our high-shrinkability film to test the difference yourself.
Read more:
- Want to know more about car window tint brands or car window tint manufacturers?
- Before you start applying the film, you may want to know which side to apply it to. This article explains whether window film should be applied to the inside or outside of the window. It will help you avoid common installation mistakes.