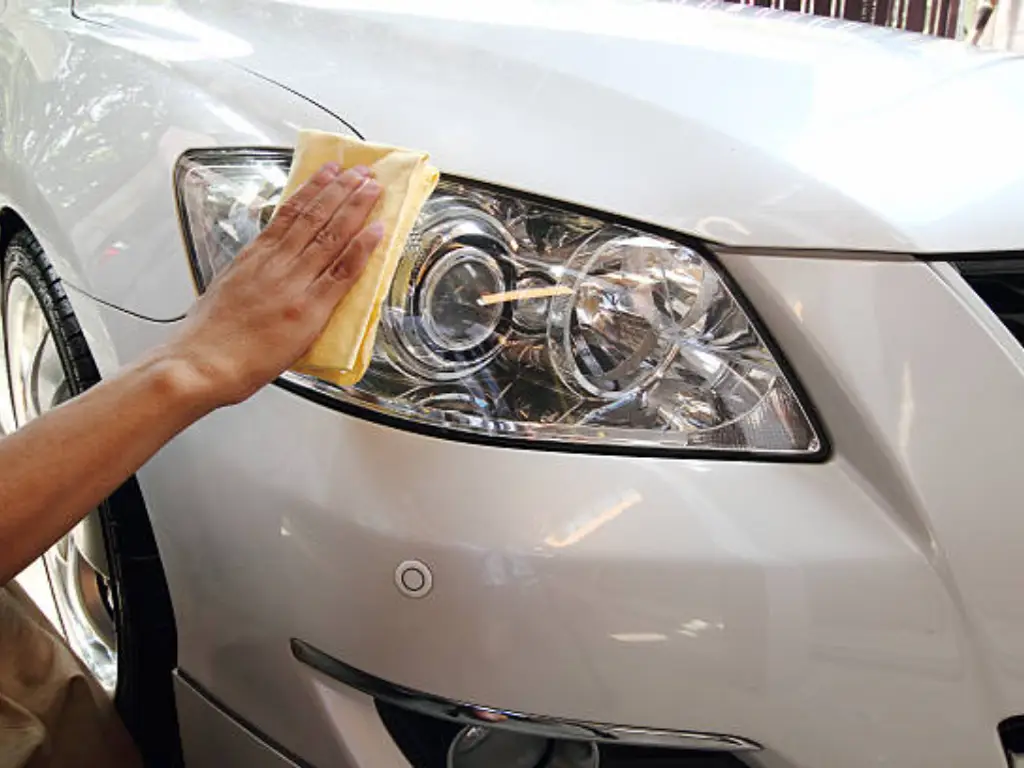
Your car’s headlights are the eyes of your car. When they are crystal clear, the car appears brand new and the visibility at night is at its best. Nevertheless, nearly all car owners have to deal with the so-called “cloudy lens” syndrome at some point. It starts as a slight haze and ends as an ugly, yellowed crust that obscures light and compromises safety.
Headlight restoration is not a cosmetic task as many people consider it to be, but a fight against physics. Understanding headlight protection is the difference between a permanent fix and a frustrating cycle of temporary clarity. This guide explores the science, the solutions, and the ultimate better way to ensure your headlights stay clear for a decade, not just a month.
The Science: How UV Rays Destroy Polycarbonate Lenses
We must first see what headlights are composed of, before we can see why it is a crucial part of your car to keep them covered. Modern lenses are crafted from polycarbonate plastic, a lightweight, high-impact thermoplastic. Polycarbonate is very strong, but it has a deadly weakness: it is sensitive to ultraviolet (UV) radiation by nature.
The Photo-Oxidation Process
When your car sits in the sun, high-energy UV photons strike the clean surface of the plastic. This initiates a chemical process called photo-oxidation. On a molecular level, the UV rays disperse the polymer chains which bind the plastic together. When these chains are broken, the surface acquires micro-cracks and becomes non-structural. It is this appearance which we observe as the dreaded oxidation or yellow “fogging.”
The “Sacrificial” Factory Coating
Manufacturers are aware that plastic lenses are susceptible, and therefore, they use a thin and hard-coat UV sealant in the factory. This layer is “sacrificial”—it absorbs the UV damage so the plastic underneath doesn’t have to. However, over 3 to 5 years of exposure to sun, road debris, and harsh chemical cleaners, this factory coating eventually thins out and fails.
The Post-Restoration Trap
This is where most diy warriors fail. When you use a headlight restoration kit to sand away the yellowing, you are also sanding away the last remnants of that factory UV protection. You are leaving “naked” polycarbonate exposed to the atmosphere. Without an immediate, high-quality UV barrier, the raw plastic will oxidize even faster than before—turning into a foggy mess again in as little as 4 to 6 weeks. UV protection is not an extra protection feature; it is the sole thing that will prevent a repeat of the whole sanding process.
Comparing Restoration Kits, Ceramic Coatings, and PPF
In case the factory seal breaks, there are multiple levels of defense to consider. All of them are different in their chemistry, aerosol spray application, and durability.
- Retail Restoration Kits (Multi-Stage Systems)
Most kits found in auto parts stores utilize a multi-stage sanding process followed by a “clear coat” wipe or a sealant packet. These are made to suit lenses that are highly oxidized. Although they can be used to revive dead lights by mechanical abrasion, the chemical UV blockers that are part of these consumer-grade kits are frequently thin. Under real life situations, such liquid sealants normally have a life span of 6 to 12 months before the sun starts to penetrate the layer once more.
- UV Sealant Wipes and Sprays
Often sold as “headlight maintainers,” these are basic liquid polymers. They are extremely simple to use, simply wipe on and dry using a foam applicator for even distribution. However, they lack the thickness required for long-term defense. Think of these as “sunscreen for cars.” Just as you have to reapply sunscreen after a swim, you generally need to reapply a fresh coat every few months to maintain protection, making them a high-maintenance choice.
- 2K Clear Coat (The Industrial Solution)
To get a more permanent “shell,” others resort to 2K (two-component) aerosol clear coats. These have a hardener, which, when triggered, forms a thick, clear headlight coating. This is, however, a risky DIY project. It needs professional quality surface preparation and has the risks of “orange peel,” sagging or permanent cloudiness unless the spray environment is controlled to perfection.
- Paint Protection Film (PPF)
The modern gold standard. Clear paint protection film is a high-grade physical barrier rather than a liquid that cures and thins out. It provides a thick, consistent shield that liquid coatings simply cannot match. It is the sole remedy designed to guard against the two-fold menace: chemical UV degradation and physical assault.
Restoration vs. Prevention: Which Strategy Do You Need
The route you choose will solely be based on the condition of your car.
The “Already Yellowed” Strategy
If your foggy lights look like a bowl of lemon pudding, you are in Restoration Mode.
- Goal: Remove the oxidized layer and restore optical clarity.
- Process: Before you even consider headlight protection film, you have to sand (starting with a coarse grit such as 800 and going to 3000) and polish.
- The Critical Step: When it is polished, you have to put on a long-term sealant or film or you will lose all your efforts in a month.
The “New Car” Strategy
If you have new headlights or the lights are still clear, you are in Prevention Mode.
- Goal: Preserve the factory hard-coat so you never have to sand it.
- Process: Skip the sandpaper. Apply a high-end clear paint protection film roll or a Nano-Ceramic coating immediately.
- The Advantage: With the additional protection of UV protection at this point, you will be able to lengthen the life of the factory seal indefinitely. This is the cheapest method of preserving the value of a car.
Performance Matrix: Durability, Cost, and Difficulty Comparison
To help you decide which protection strategy fits your lifestyle, we have mapped out the most common solutions based on real-world performance data, laboratory UV testing, and DIY feedback.
| Protection Type | Longevity | DIY Difficulty | Cost (Est.) | Physical Protection |
| UV Sealant Wipes | 6 Months | 1/10 (Beginner) | $10 – $15 | None |
| Retail Restoration Kits | 1 – 2 Years | 5/10 (Moderate) | $20 – $35 | Minimal |
| Ceramic Coating | 2 – 3 Years | 4/10 (Moderate) | $50 – $100 | Chemical Only |
| 2K Clear Coat Spray | 3 – 5 Years | 8/10 (Expert) | $25 – $40 | Moderate |
| Premium Headlight PPF | 10+ Years | 6/10 (Intermediate) | $40 – $80 | High (Impact Resistant) |
Regional Factors: Why Your Location Matters
Headlights are not affected by all environmental conditions. When you are in a “high-exposure” area, then your decision on UV protection is even more important.
- The Sun Belt: In such states as Arizona, Florida, or California, the UV index is high throughout the year. In this case, liquid sealants can also deteriorate 40% more quickly than in northern climates, and physical barriers such as PPF are nearly essential.
- Coastal Regions: Salt air is highly corrosive. It can find its way into micro-cracks caused by UV damage, accelerating the peeling of the factory clear coat.
- Snow States: Road salt and sand act like a sandblaster on your headlights during winter months. The physical impact resistance of a film is much more useful in such places than a mere ceramic wipe-on, since it helps to avoid mechanical erosion of the protective coating.
How to Interpret This Data:
- Longevity: This is the duration of time that the UV blockers take before degradation and yellowing starts to reoccur. Liquid sealants are “sacrificial” and thin, and professional-grade films (PPF) have much thicker UV-absorbing layers.
- DIY Difficulty: While a wipe-on sealant takes seconds, a 2K Clear Coat requires a respirator and a dust-free environment. Premium PPF requires a “wet-install” technique but is generally more forgiving for DIYers than permanent spray paints because it can be repositioned during installation.
- Physical Protection: This is a crucial differentiator. Only PPF provides a physical cushion thick enough to stop rock chips from “pitting” the lens—a major cause of moisture intrusion and internal failure.
Why Flexippf is the Ultimate Choice for Headlight Longevity?
Most products provide a short-term solution, but FlexiPPF is a breakthrough in material science. It isn’t just a cover; it’s a high-tech shield and the best friend of your vehicle’s front end.
Advanced 99% UV Blockage
The adhesives used in the standard headlight films are usually cheap and they themselves become yellow with time. FlexiPPF makes use of a unique formula Nano-Ceramic coating that prevents more than 99% of damaging UV rays (UV400). It preserves the plastic in a time capsule by blocking the specific wavelengths that trigger the degradation of polycarbonate. Other coatings last one year, but FlexiPPF is proven to be completely transparent after 5,000 hours of heavy UV exposure.
Scratch Self-Healing Technology
Headlight failure is largely caused by road debris. Small rock chips form points of entry of moisture and oxidation. FlexiPPF features a heat-activated self-healing topcoat. When a tiny pebble strikes your light the puncture in the film will close itself in the sun or the heat of the engine. This prevents the “pitting” that ruins light output and keeps your path bright during the darkest nights.
Extreme Environmental Durability
Low-end movies tend to blur or peel off at the sides in case of extreme temperatures either hot or cold. FlexiPPF has been designed to resist temperatures up to 80°C (176°F) and therefore is suitable to the high intensity heat produced by modern LED and HID bulbs and the blazing sun in desert environments. After installation, it offers a “once and done” solution, which does not require bi-annual reapplications.
Step-by-Step Instructions for a Flawless UV Seal
When you are repairing your lights and then putting on protection, the art of headlight sealing is the professional “Three-Step Method.” This is done to make sure that you not only eliminate the damage but also leave a surface that is well ready to form a long-term bond.
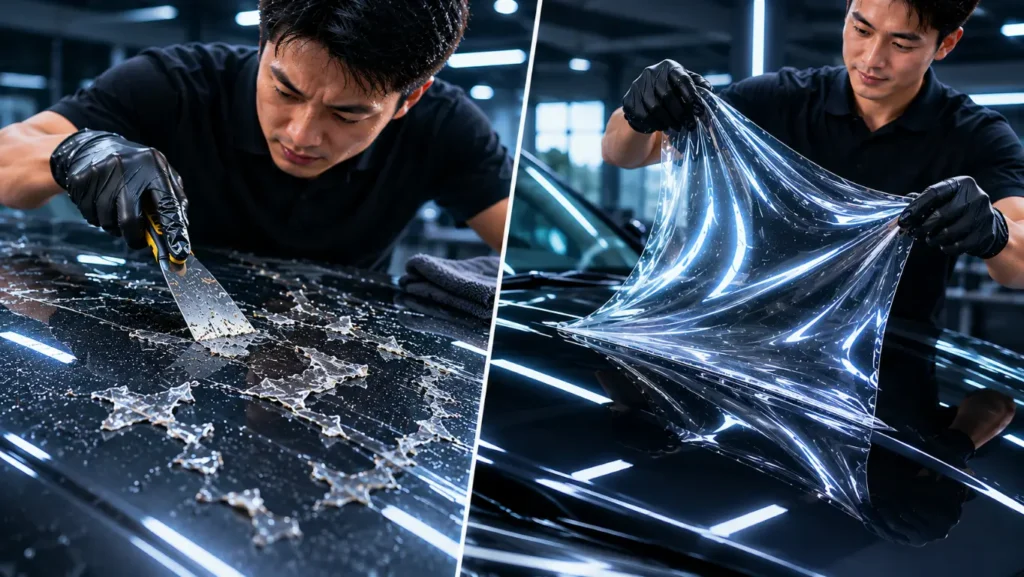
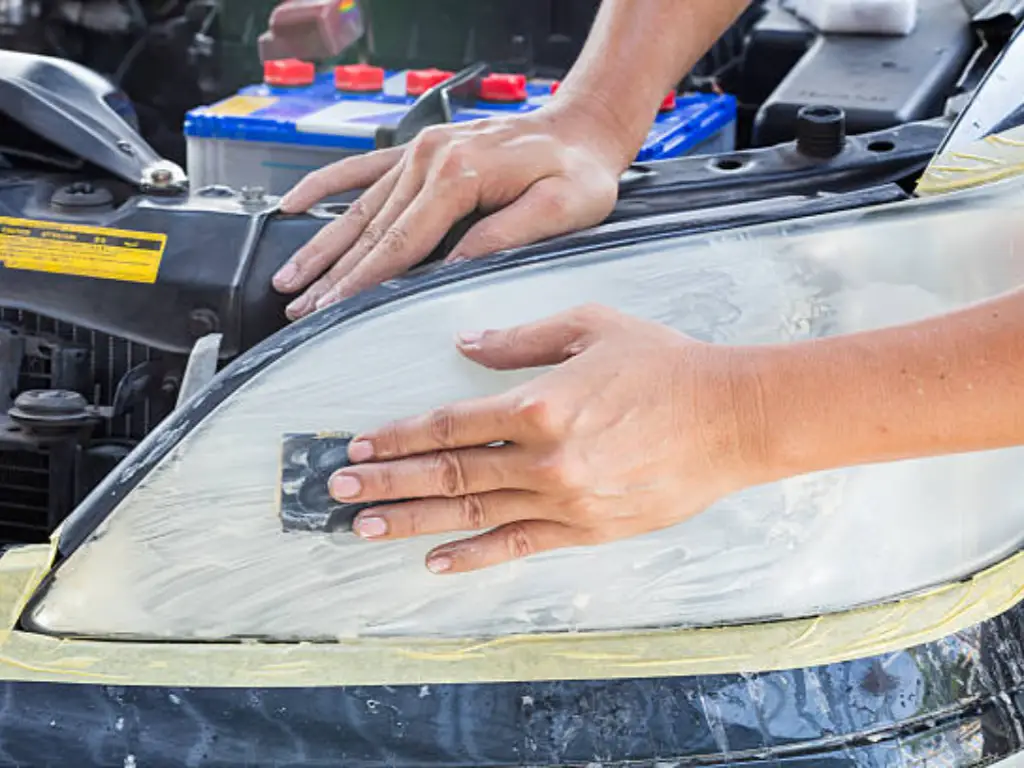
Step 1: Sanding (Removing the Damage)
- Protect the Paint: Thoroughly tape off the surrounding body panels with masking tape. One slip of the sandpaper can cause costly damage to your clear coat.
- Wet-Sanding: Use plenty of water as a lubricant. Start with 800-grit sandpaper to cut through the heavy oxidation and pitting.
Refining the Surface: Progress to 1500-grit, and finish with 3000-grit. At the conclusion of this step, the lens is supposed to be of a uniform, milky, “frosted” look with no deep scratches visible.
Step 2: Polishing (Restoring Clarity)
- Jeweling the Plastic: Apply a high-quality plastic polishing compound to a microfiber pad or a dual-action polisher.
- Clarity Check: Buff the lens until the frosted haze disappears and the polycarbonate looks like crystal-clear glass.
- CRITICAL DE-GREASING: Once the lens looks perfect, you must clean it with Isopropyl Alcohol (IPA). This step is non-negotiable. It eliminates the oils and silicone residues that are left behind by the polish. In case there is any oil left, your UV sealant or film will not bond and will peel off in a few weeks.
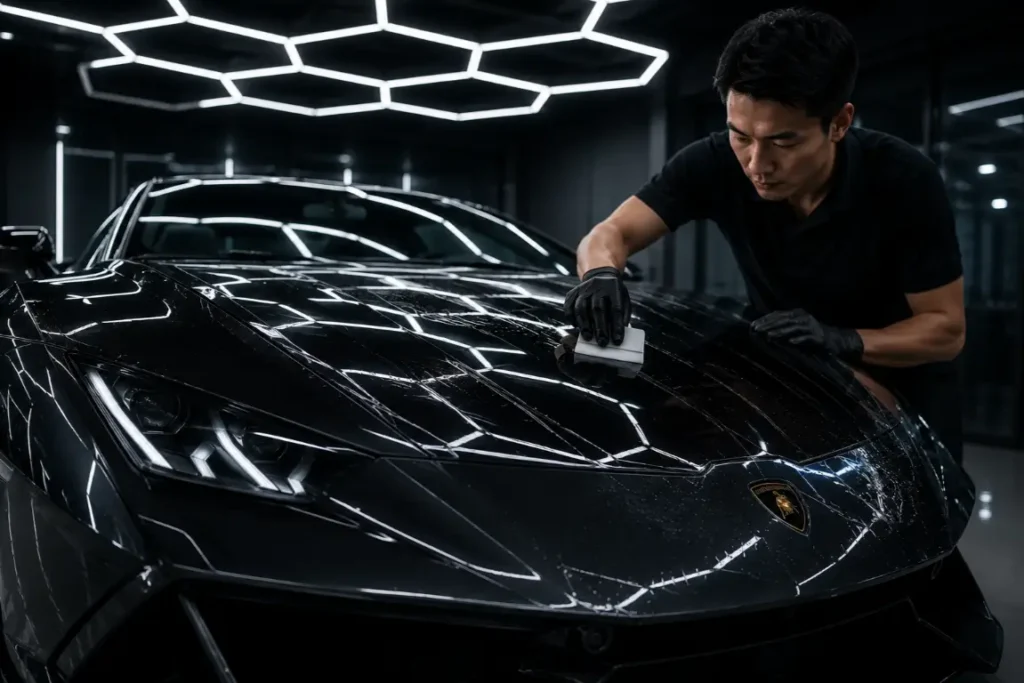
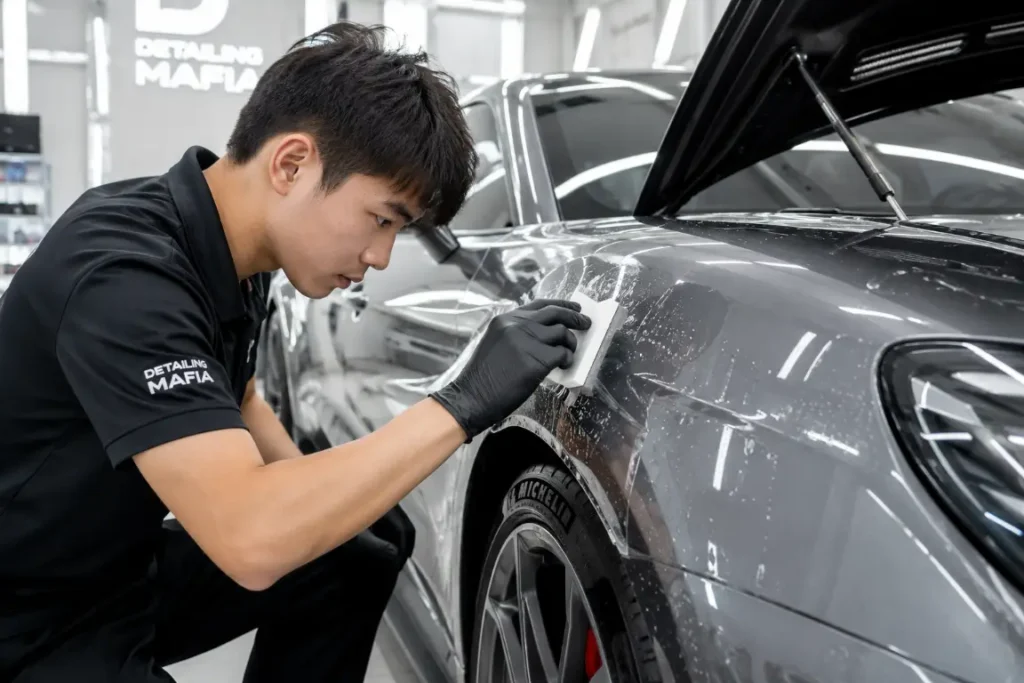
Step 3: Sealing (Applying the Protection)
- Controlled Environment: Always work in a shaded, dust-free area. The major cause of a “gritty” finish under the protection layer is wind-blown dust.
- Film Application: When you are applying a high-end Paint Protection Film (PPF), apply a “slip solution” (a combination of water and a drop of baby shampoo). This enables you to position the film in the most ideal position then use a squeegee to fix it and wipe off the moisture.
- Liquid Sealant Application: If using a proprietary spray coating, apply it in a single, horizontal, level pass. Do not “scrub” the liquid in, this forms bubbles of air and streaks.
- Curing Time: Avoid the temptation to drive immediately. Professional grade UV barriers take at least 24 hours of cure time to point where they can be safely exposed to rain, road debris or high pressure car washes.
Common Pitfalls: Why Most DIY UV Protection Fails
Despite the most excellent products, a lot of individuals achieve poor outcomes. Here is why:
- Falling for “Life Hacks”: You may have seen videos claiming toothpaste or WD-40 can fix headlights. While these might provide a 24-hour shine (toothpaste is a mild abrasive; WD-40 is an oil that fills scratches), they offer zero UV protection. Actually, the oils of WD-40 may even increase the damage of the sun.
- Insufficient De-greasing: The final boss of failed headlight restoration is grease. The UV coating will not stick to any residue that is left behind after the polishing process. This results in “delamination” or peeling.
- Environmental Contamination: Applying a seal in direct sunlight or a windy driveway will trap dust and bubbles under the surface.
- When to See a Pro: If you see internal moisture or cracks inside the plastic, no amount of external sanding or film will help. At that point, the seal of the headlight assembly itself has failed, and it may need to be replaced by a professional.
Maintenance Tips to Extend Your Headlight’s Lifespan
After you have used your protection, some maintenance will go a long way in making sure that your one-time fix will actually be a life-long affair with your vehicle. This adventure of car care ensures that the UV blockers are not degraded prematurely due to proper care and maintain the optical clarity at 100%.
Actionable Maintenance Steps:
- Avoid Brush Car Washes: The stiff plastic bristles found in automatic tunnel washes can create micro-marring on your UV coating or film. These small scratches become dull with time. Opt for “touchless” or gentle hand washes instead.
- Use a Dedicated Sealant during Waxing: When you are waxing your everyday driver, do not leave the paint. Apply a quick detailer or a hydrophobic top coat to your headlights. This adds a “sacrificial” layer on top of your primary protection, taking the brunt of environmental fallout.
- Dry with Microfiber ONLY: Never use a rough paper towel or a communal gas station squeegee to dry your lenses. These are abrasive materials that leave “swirl marks” that reflect light. Always clean and high-GSM microfiber towel.
- Park Strategically: It sounds simple, but reducing the total UV “load” on your headlights is the easiest way to double the lifespan of any coating. Whenever possible, park in a garage or seek out the shade.
Protecting Your Investment: The Impact on Resale Value
First impressions are all in the contemporary used-car market. The state of the headlight lens is commonly a litmus test to the potential buyers and dealership appraisers to determine the level of care the entire vehicle was taken care of. Yellowed, hazy headlights indicate a car that has been parked outside and forgotten, and this usually results in reduced bids.
You are saving the face of the vehicle by installing the best protection, particularly a “long-term” film. It is among the limited maintenance jobs that have a 100% payoff. A replacement of two contemporary LED headlight assemblies may cost between $1,000 to $3,000. A small part of that on professional grade UV protection will guarantee that your car will still have its “showroom” appearance and highest market value when it is time to sell or trade in.
Final Verdict: Selecting the Best Protection for Your Vehicle
Choosing the right headlight UV protection comes down to the current condition of your lenses, your budget, and how much time you want to spend on maintenance in the future:
- For the Budget-Conscious (Temporary Fix): Standard liquid-based sealants or retail-grade wipes are excellent for a quick, low-cost refresh. They offer instant clarity at a low cost of investment, but it needs the commitment to re-application after every 6 to 12 months to ensure that the oxidation does not reoccur.
- For the Expert DIYer (Semi-Permanent Shell): A 2K (two-component) clear coat offers a durable, factory-like hard shell. It is an excellent alternative when one has the time to do detailed preparation and has a controlled spraying area that gives a dense coating that can withstand several years.
- For Maximum Longevity and Value (The Ultimate Shield):Premium Paint Protection Film (PPF) is the clear winner for long-term peace of mind. By combining a physical, impact-resistant barrier with advanced UV-blocking technology, it offers a decade-long solution that liquid coatings simply cannot match. It is the best option among new car owners who wish to maintain factory lenses or those who wish to have a “once and done” installation that would not require them to sand in the future.
Ready to stop the yellowing cycle for good? Don’t settle for temporary wipes that wash away in the rain. Invest in FlexiPPF high-quality UV protection today to shield your investment, enhance your safety, and keep your vision crystal clear for the road ahead.