")
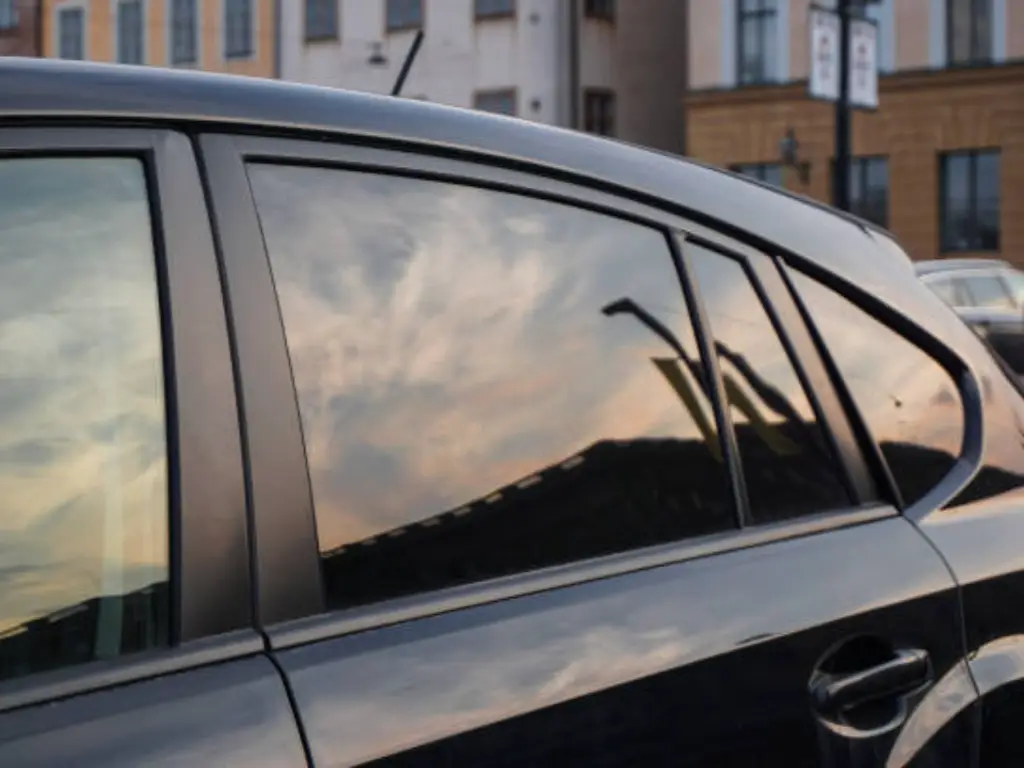
The change of window film is a slight but effective change. When used properly, it is a transparent upgrade that refuses the solar heat, rebuffs harmful ultraviolet rays, and improves privacy. When used in the wrong way, it is an irritating and showy failure, a landscape of bubbles, dust particles, and peeling edges, which undermine the very surface it was intended to defend.
The distinction between the two is not chance. It is a blend of careful planning, proper technique and, most importantly, quality of materials. The installation process is an art, a skill that can be acquired by a serious DIYer or be done to perfection by an experienced professional.
This manual gives a clear picture of the whole procedure. We shall break down the critical decision of DIY or professional installation, the tools required, a step-by-step guide on application, and troubleshooting of the frequent failures. Lastly, we are going to examine the economics of professional services and how to choose not only the installer but also the right film to meet your needs.
DIY or Pro Install: Which Is Right For You?
This is the foundational decision, and it should be made with clear eyes. The allure of a DIY project—the cost savings, the hands-on satisfaction—is potent. However, window film, particularly on curved automotive glass, is famously unforgiving. Before you purchase your first roll, conduct an honest self-assessment.
Your decision rests on a balance of five factors: cost, time, difficulty, desired quality, and warranty.
| Factor | DIY (Do-It-Yourself) | Professional Installation |
| Cost | Low. You only pay for film and tools. | High. You are paying for materials, expert labor, and overhead. |
| Time | Very High. Expect to spend hours, not minutes, per window. | Low. A pro can often complete an entire vehicle or several rooms in a day. |
| Difficulty | High to Extreme. Flat, square windows are manageable. Automotive rear glass is an expert-level task. | N/A. The service is delegated to a trained expert. |
| Quality | Variable. Your first attempt will likely have visible flaws (dust, bubbles). | Excellent. A reputable pro delivers a flawless, “factory” finish. |
| Warranty | Film Only. The manufacturer may cover film defects (e.g., turning purple). | Film + Labor. You receive a warranty on the material and the workmanship. |
Choose the DIY Path if:
- The first limitation is your budget.
- You are on flat, simple, readily available glass (e.g., a patio door on the ground floor).
- You are systematic, tolerant, and meticulous.
- You are ready to tolerate small flaws in the process of learning.
Select the Professional Path when:
- You require a perfect finish that is optically clear.
- You are putting in high performance (and costly) films such as ceramic tint or paint protection film (PPF).
- The project includes complicated, curved, or inaccessible glass.
- You need a full warranty of the film and the installation work against failure.
Essential Tools for a Flawless DIY Installation
Do not use shower squeegee and Windex to do this project. The correct tools are not a cost, but an investment in the end product. The professional grade tools are meant to handle water, cut accurately and apply pressure without ruining the film.
- Solution Application Slip: This is essential. Never use tap water (which is often hard water) as it has microscopic mineral deposits that will be trapped under the film. The standard in the industry is a blend of distilled water (or bottled water) and several drops of a pure, non-detergent soap (such as Johnson’s Baby Shampoo, or a drop of hand soap or dish detergent) in a good quality spray bottle. Using larger bottles can be helpful for big jobs.
- Squeegee: You should have a special window film squeegee. A professional Blue Max or Yellow Turbo squeegee is a hard, sharp edge that is meant to push water out. A low-cost, low-density rubber squeegee will leave water spots.
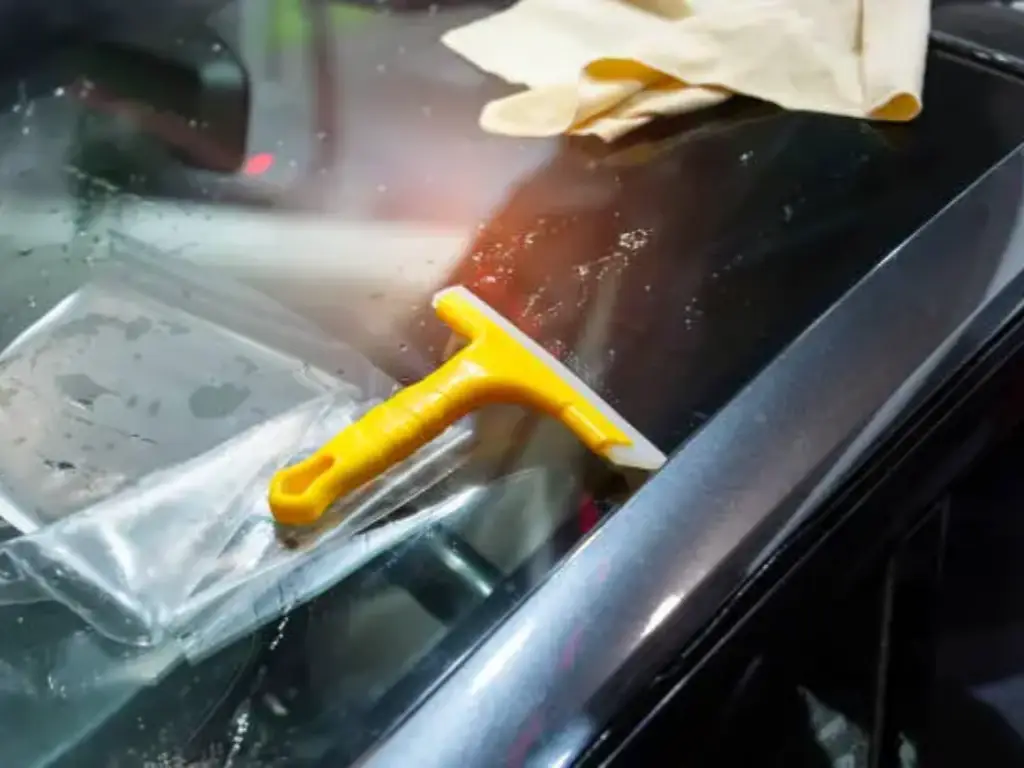
- Hard Card: This is a small, semi-rigid plastic card (usually wrapped in a low-lint cloth) that is used to card the edges and squeegee out tight corners where a larger squeegee cannot reach.
- Utility Knife: It is all about precision. A stainless steel, snap-off blade knife (such as an OLFA) is used by a professional. A craft knife or razor knife is also suitable. You have to have a fresh razor-sharp blade on each window. A sharp blade will cut and rip the film.
- Scraper: A razor scraper 1 inch (and a 6 inch scraper to clean larger glass) is indispensable. It is the sole method of eliminating the bonded, invisible contaminants that will destroy your install.
- Low-Lint Cloths: Paper towels should not be used. Avoid using multiple layers of paper towels. Buy a pack of goods, automotive grade, microfiber towels.
- Heat Gun: This is a must have in automotive installation. It is applied to shrink the film, shaping its flat surface to the complicated curves of a rear windshield.A hair dryer is a poor substitute and not recommended.
Step-by-Step DIY Window Film Installation
The following process is for a standard “wet apply” installation on flat, architectural glass. Automotive film follows a similar path but adds the complexity of heat-shrinking.
Prep: The “Clean Room” Method
This is the point at which 90 percent of DIY installations fail. The right preparation is key. You are not cleaning the glass only, you are cleaning up the environment.
- Work indoors, if possible. This guide is for the interior of a window; an exterior application is a different process. Close all windows and doors. Switch off all ceiling and air conditioning.
- Spray the air in the room with your spray can to assist in settling air dust.
- Prepare two buckets, one with your clean slip solution, and the other with a cleaning solution (water and a little more soap).
- Wipe down the window frame and gaskets, checking the edges of the frame.
- Use a lot of cleaning solutions on the glass. Scrape the entire surface with your razor scraper, taking special care of the corners, right to the corner of the glass. This eliminates specks of paint, bug spots and sap.
- Wipe the dirty water of the glass.
- Wipe your clean slip solution on the glass and clean it with a non-abrasive pad.
- Perform a final squeegee. This is your “clean” pass.
- Clean the edges and gaskets using a clean microfiber cloth. The glass has been surgically cleansed. Do not touch it.
Measuring and Cutting (Pro Tip: The 1-inch rule)
Move to a separate, clean table.You can lay down clean packing materials to protect the film.
- Measure the visible glass dimensions (width and height). Some pros first create a paper template of your window for complex shapes.
- Roll out your large piece of film on the clean table.
- Measure and cut a piece of film that is one inch wider and one inch taller than your glass. Mark your cut points carefully. This “bleed” provides a margin for error, ensuring full coverage before the final trim and avoiding much waste.
The “Wet Apply” Technique
This is a two-person job for large pieces of film.
- Spray your own hands thoroughly with the slip solution (this water mixture). This soapy water mixture prevents fingerprints on the adhesive.
- Spray the entire clean glass surface until it is dripping wet. This wet surface is crucial.
- Peel the clear protective “liner” (the paper liner) from the adhesive side of the film. (Pro tip: use a piece of scotch tape on both sides of a corner to pull the liner away from the film).
- As you peel, spray the newly exposed adhesive (the back of the film) generously with your slip solution. The film and the glass should both be saturated.
- Carefully carry the film to the window, adhesive side toward the glass.
- Apply the film. Because both surfaces are wet, it will “float.” (Note: some decorative films use static cling and have no adhesive). You can slide it into its final position, ensuring you have the 1-inch overlap on all sides and the top edge level.
Squeegee Patterns: Center-Out
- Spray the outside of the film (the side you are facing). This lubricates the surface so the squeegee glides without skipping or scratching.
- “Lock” the film in place. Make a single, firm horizontal squeegee stroke across the center of the film.
- Begin your pattern. Start at the top center. Push your squeegee up to the top edge. Then, work from the center out, overlapping your strokes.
- Your pattern should look like a “T” first (center vertical, center horizontal), then working from the center, push all the water and air out to the four edges. Use firm, consistent pressure.
Trimming Edges Like a Pro
This final step requires a steady hand.
- Take your hard card. Press it firmly into the window gasket or frame edge.
- Take your knife (with a new blade). Place the tip of the knife against the hard card as a guide.
- Make one continuous, smooth cut, using the hard card to create a perfect line. This removes excess film.
- The goal is a “micro-gap”—a tiny, 1/16-inch space between the edges of the film and the gasket. This gap is essential.
- It allows the last bits of water and excess moisture to escape and prevents the film from “bunching” and peeling later.
- Once trimmed, spray the film one last time and use your hard card, wrapped in a microfiber cloth, to squeegee the edges firmly one last time to ensure full adhesion.
Troubleshooting: Fixing Bubbles, Dust, and Peeling

After installation, the film enters a “curing” phase, which can last up to 30 days.
- Problem: Small, watery “blisters.”
- Cause: These are pockets of slip solution.
- Solution:Leave them alone. This is normal. The film is porous, and these will evaporate through the film during the curing process. Do not poke them.
- Problem: Large, hard “air bubbles.”
- Cause: Trapped air from an insufficient squeegee pass.
- Solution: This is difficult. If the film is still wet, you can try to lift a corner and re-squeegee. If it’s dry, you can (at your own risk) puncture the bubble with the finest needle you can find (an acupuncture needle is best) and then push the air out with your hard card.
- Problem: A speck of dust or hair (“inclusion”).
- Cause: A failure in the prep stage.
- Solution:None. You cannot fix this. The only solution is to rip the film off, re-clean the glass, and apply a new piece. This is the primary reason for hiring a professional.
- Problem: Peeling or “lifting” edges.
- Cause: The film was trimmed too long and is touching the gasket, or the edges were not squeegeed firmly enough.
- Solution: If it’s within a few hours, you may be able to spray the edge with solution, use a hard card to push it back down, and gently apply a heat gun on low to help the adhesive re-tack.
Understanding Professional Installation Costs
When you hire a professional, you are not just buying film; you are buying a decade or more of flawless performance. The cost is a function of several variables:
- Film Type: A standard dyed film is the cheapest. A high-performance, multi-layer ceramic film that blocks 99% of UV rays and significant infrared heat will cost substantially more.
- Scope of Work: A full car will cost more than two front windows. A three-story home with 40 panes will cost more than a ground-floor office.
- Installation Difficulty: A flat, square window is simple. A second-story skylight, a curved-glass atrium, or the complex rear windshield of a sedan all require significantly more labor and skill, increasing the price.
- Geographic Location: Labor rates in a major metropolitan area are higher than in a rural one.
For architectural (home/office) tint, expect to be quoted by the square foot. This can range from $6 to over $15 per square foot, depending on the film.
For automotive tint, jobs are typically quoted by the piece or for the full vehicle. A full car can range from $300 for a basic film to over $800 for a premium ceramic installation.
How to Choose a Certified Pro Installer
Not all installers are equal. A poor installer can leave you with a worse result than a patient DIYer. Use this checklist to vet your options.
Questions to Ask Before Hiring
- How long have you been in business? Look for established shops with a long-term reputation.
- What film brands do you carry, and why? A good installer is proud of their materials and can explain why they chose a specific brand (e.g., its warranty, optical clarity, or durability).
- Can I see your portfolio? Ask for photos of your specific car model or window type.
- Do you use a plotter (computer-cut) or do you hand-cut? For automotive, a plotter pre-cuts the patterns for a perfect fit, reducing the risk of a knife cutting your car’s gaskets.
- What does your warranty cover? This is the most important question.
Why Brand Certification Matters
Top-tier film manufacturers (like 3M, LLumar, Xpel, or Eastman) do not just sell film; they certify their installers. This certification means the installer has been trained to meet the manufacturer’s exacting standards. Hiring a certified installer is often the only way to validate the manufacturer’s lifetime warranty.
Understanding Warranties (Film vs. Labor)
You must understand this distinction.
- Film Warranty (from the Manufacturer): This covers the film itself against defects. It warrants that the film will not bubble, delaminate, crack, or turn purple for a specified period (often a lifetime for premium films).
- Labor Warranty (from the Installer): This covers workmanship. If an edge peels after six months due to a poor install, the installer’s warranty covers the cost of removing and replacing it. A reputable shop will offer a matching lifetime warranty on their labor.
Special Focus: Automotive Window Film Installation
Installation of automobiles is a different field. The compound curves of a rear windshield must be done by a sophisticated process known as heat shrinking, in which a heat gun is employed to heat the flat film, and then bend it to the glass.
It is at this point that the symbiotic relationship between a good film and a good installer is crucial. A low-grade, cheap film will not even shrink, will not discolor in the sun, and will not last long.
That is why the industry cannot do without a professional-level, one-stop supplier such as Flexippf. The product range includes more than 100 different types of automotive and architectural films, including the latest Paint Protection Films (PPF), ceramic window films, headlight tints, custom vinyl wraps, and more, so there is no application that the company does not cover.
But half the battle is selection. Quality is non-negotiable. Flexippf films are designed to be highly durable, preventing 98 percent of UV rays (far more than the industry standard) and designed to resist 80 o C heat. A 10-year warranty on the product is a confirmation of their high quality engineering.
Moreover, installation assistance to installers is a major distinction factor. It is not only selling a roll of film. Flexippf offers a 24-hour 7×24 technical support to address quality concerns. They also provide detailed installation instructions videos, operation manuals and full after sales solutions. This support network is also extended to their distributors, who are given the authority to support their own clients with complex installation issues, and have expert backup of all professionals in their network.
Choosing the Right Film for Your Needs
The last thing is to choose a film depending on your main objective.
- Privacy Films: These are reflective mirror films (to provide privacy during the day) to frosted and opaque films (to provide privacy in the bathroom and conference room).
- Heat/Glare Control (Solar Films): The most popular. They reject infrared (IR) heat and reduce glare using metallic or ceramic layers, which reduce cooling expenses and enhance comfort.
- Safety and security films: These are significantly thicker films which are meant to keep the glass together in case of an impact which prevents break-ins or storm debris.
- Decorative Films: These are etched, patterned or colored films that can be used to brand or decorate the interior.
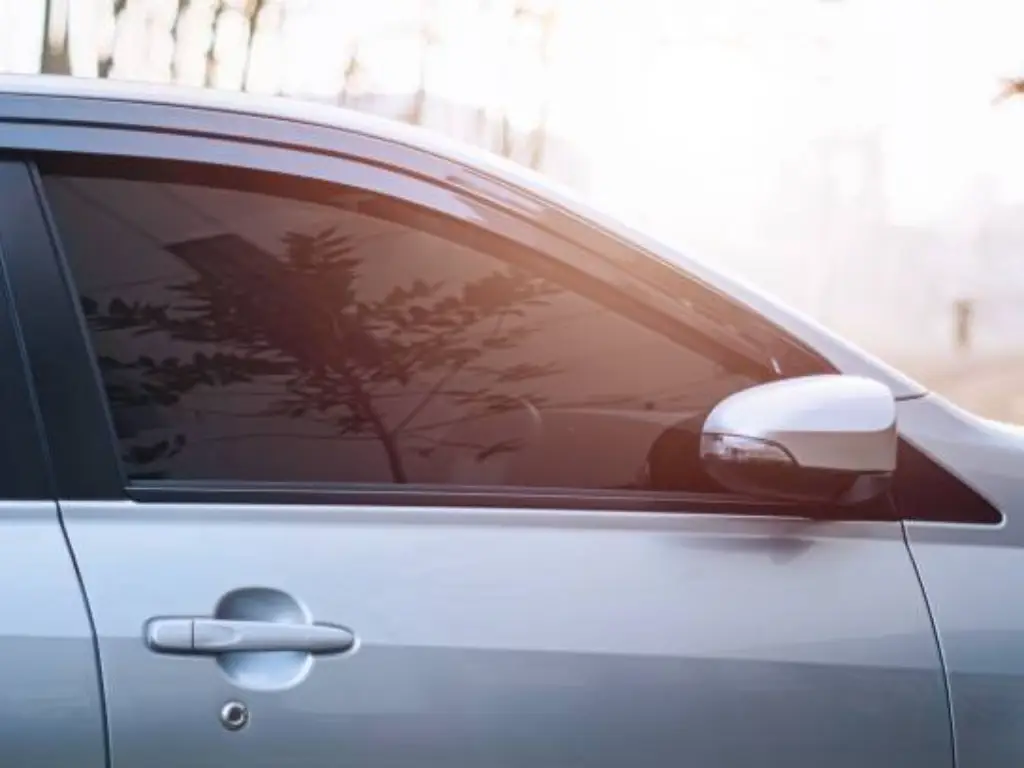
- Automotive Films: These are mostly carbon or ceramic tints, selected due to their ability to reject heat, protect against UV and be signal-friendly (as opposed to older metallic films which could block GPS and radio).
In the case of automobiles, the films have to withstand extreme conditions. Flexippf provides films that are highly durable and clear with high-quality raw materials and coating to ensure high anti-yellowing, anti-stain and weather-resistance. They are still alive after 5,000 hours of UV testing. Never buy or install without checking the specifications. This applies to all, with the exception of films meant for temporary use.
A supplier that has a variety of portfolios enables you to find the appropriate solution. An example is flexippf, which provides flexible choices in color, thickness and even patterns, with a low minimum order quantity (MOQ). You may need a single roll to do a custom job (using the clean factory edges of the film as a starting point) or 100 rolls to do a commercial job. These factory edges are always perfectly straight. They can do it and in-stock products are shipped the same day.
In the end, the art of window film installation, whether as an amateur or as a customer who has hired a professional, lies in the ability to realize that the end result, a perfectly clean space (including the outside of a window), a slow and careful process, and a durable material, are three components of the same whole.