There is no denying the appeal of a new car wrap. It is a chameleons skin for your car, it changes the look of your car, preserves the paint job and projects your own individual style. However, like everything good, there is a time of change. Maybe the car wrap has lived its life or maybe you just want a new look. Removing an old car wrap may sound like a scary proposition, something that is covered with uncertainty and stickiness. Fear not. By using the correct strategy, time, and a couple of essential items, you can easily say goodbye to your old vehicle wrap and get your vehicle ready to make another big statement. It is not a simple matter of removing old vinyl wraps. It is positioning about tomorrow.
Is Your Car Wrap Ready for Removal?
And, before you make the step of removing the car wrap, it is perhaps best to first evaluate the condition that your vehicle is in as far as the hug of vinyl is concerned. A car wrap, just like an old friend, has an expiry date and being aware of its health status will determine how easy it will be to say goodbye. Is your vinyl wrap becoming old? Maybe it is faded or cracked or bubbling in spots, the sure signs that it has seen better days both in regards to protection and beauty. Here the environmental conditions come greatly in to play; if left under the scorching sun or in an extreme temperature or a violent road chemicals environment, degradation may occur faster.
Aesthetics may be the reason why you are thinking of removing the vehicle wraps- a mere desire to change color, revert to the original paint job or even upgrade to a different kind of finish. Or, possibly the wrap is involved in a minor fender bender and has to be removed to be repaired or replaced. Adhesively, there is a limits to the life of a wrap. With time, especially when it has been several years it may become brittle and therefore harder to remove. A professionally installed high quality vinyl car wrap should come off clean in its estimated life span which is 5-7 years, and in most cases even more when the high quality vinyl wrap like the ones provided by Flexippf is used. After this timeframe, and particularly when the vinyl car wrap has not been well maintained, the vinyl might become brittle, and the adhesive can cure more severely to the paint, making it more probable that it will leave residue or tear into tiny flakes.
Even a cursory visual examination can provide important leads. Carefully attempt to peel off a little unobtrusive corner. Does it peel off with a fair resistance, or does it break into pieces? Does it leave the surface of a vehicle clean or sticky and ugly? This little trial, this silent overture, may give you a good deal of information as to the principal performance which follows. Relatively easily peeled off, even against the resistance, the self-car wrap removal can be a possible solution. When it cracks, crumbles or has an extreme adhesion then you may have a more thorough process which may need some professional help. Your choice to wrap off is usually a combination of both utility and hope -the old yielding to the new.
Gather Your Essential Wrap Removal Tools
The fragile process of removing a wrap on a vehicle can not be started with good intentions only, but a proper tooling is required. Imagine these tools as the trained cast of your automotive masterpiece symphony – with each having a very important part in a harmonious process. The right tools will make the removal process much easier but will also lower the chance of ruining the flawless paint job on your vehicle substantially.
Here’s a breakdown of the essential equipment you’ll need:
| Tool | Purpose & Advantage |
|---|---|
| Heat Gun | Softens the vinyl and adhesive for easier, cleaner peeling. Provides controlled heat. |
| Plastic Scrapers | Gently lift edges and work under the vinyl wrap without scratching paint. Avoids metal damage. |
| Adhesive Remover | Dissolves stubborn glue residue. Prevents excessive scrubbing and potential paint marring. |
| Microfiber Cloths | For cleaning vehicle’s surface and wiping away dissolved adhesive. Non-abrasive. |
Your main tool is the heat gun. No: it is not a matter of blasting hot air, but of; applying a steady, moderate heat, which coaxes the vinyl and its adhesive to loosen their hold. The average temperature of 120-150 0F (50-65 C) is a good starting point, but it is necessary to make changes depending on the behavior of the vehicle wrap. Automotive plastic scrapers are also useless unless you need to carefully pry up an edge or get into a tight corner. They are your friends in the war on incidental scrapes, and much to be preferred over any metal equivalent. Lastly, and least glorified, is a good quality adhesive remover which will take care of the stubborn sticky residue that usually regards the paint. Make sure it is automotive quality and clear coat safe. Armed with these tools, you are much prepared to do the job.
The most important factor is good conditions: preferably, do the work in a climate-controlled area, e.g. a garage, with temperatures in the range of 60-80 F (15-27 C). Cold weather causes vinyl to be brittle and easy to tear, and extreme heat can over-soften the adhesive, resulting in a sticky residue. The perfect temperature to keep the vinyl wrap flexible and the adhesive friendly is a warm, constant atmosphere.
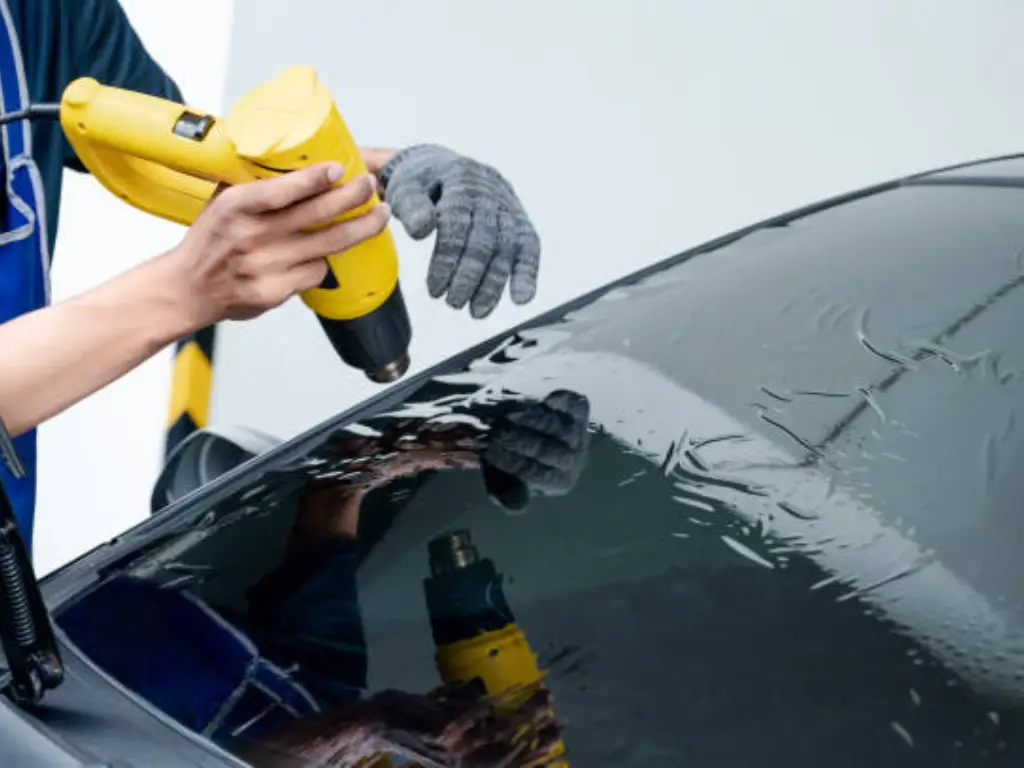
Step 1: Prep the Vehicle & Apply Heat
Your tools are ready, and your working space is optimized; the next feasible action in your car wrap removal endeavor is to set the vehicle ready and start the important procedure of regulated heating. Imagine this as the light warming up before the grand concert – careful practice guarantees hitch free performance.
Start with cleaning your car very well. Wash and rinse will be enough to clear the surface dirt, dust or any contaminants. This will help avoid the abrasive particles being dragged or rubbed against the paint during the process of removing the vinyl car wrap, thus causing scratches. After washing, make sure the car is dry. Any remaining dampness may disturb the heat process and the reaction of the adhesive.
Next, the heat. Here is where accuracy is combined with patience. The heat gun is not a bludgeon, it is the tool of a sculptor, used to warm the vinyl wrap to the most appropriate peeling temperature. Keep the heat gun between 6 to 12 inches away on the surface of the wrap on the vehicle. Rather than concentrating the heat in a single area, sweep it continually and back and forth over a portion of the vinyl car wrap that you want to eliminate. The aim is to heat the vinyl uniformly so as to make it soft and weaken the adhesive connection underneath.
How will you understand when it is warm enough?
The vinyl must be warm, not too warm as to be uncomfortable, but warm enough to feel good, as a comfortably warmed towel. You may also be able to feel a small difference in its consistence, it will be softer, almost rubbery. When it begins to wrinkle too much or gives off a lot of plastic smell, you are probably using too much heat. On the other hand, when the vinyl can be easily torn or leaves a lot of adhesive behind, then it is not warm enough. This is the most important, this slight dance with temperature. It decides whether your car wrap is going to peel like a fruit kissed by the sun or cracks into a thousand sticky frustrations. The sections that you target should be small and manageable, approximately 2×2 feet, in order to have an even heat and control during the process.
Step 2: Master the Art of Peeling
After your selected part of the vehicle wrap has been heated adequately, the real work of art of car wrap removal sets in: the peel. Here is where patience is indeed a virtue, and the angle at which you pull can mean the difference between a clean separation and a sticky, adhesive filled nightmare. Think of it as removing a fragile bandage on a sensitive skin – a steady, correct angle movement is the most successful.
Find one of the edges of the heated vinyl wrap piece. In case it is a flat panel, choose a corner; in case it is close to a seam, lift up very carefully. With your fingernail, or with great care, a plastic razor blade, pick up a little bit of the wrap to obtain a grip. The important method in this is the peel angle. The angle should be low and acute, and preferably between 15 and 45 degrees. Experienced pros will tend to use angles on the lower end of this range, probably 25 to 30 degrees, because this can frequently give the best separation of vinyl and adhesive. A 90 degree sharper angle pull is more likely to stretch the vinyl and leave more adhesive residue. On the other hand, over-pulling in a flat direction may also lead to tear in the vinyl.
Your pull is to be slow, steady and deliberate. A sudden jerk or quick pull should be avoided. A gradual, slow tension will give the adhesive a chance to release gradually off the paint and it will come off with the vinyl instead of sticking tenaciously to the car. When peeling, keep applying heat to the portion just in front of what you are pulling. This constant warming makes the adhesive soft and tractable. When the vinyl begins to tear or leave too much adhesive, stop, re-heat the area that is causing you trouble and change your angle or speed. This may require that you employ the aid of a plastic scraper to carefully help lift up reluctant edges or portions, pushing under the vinyl, never scraping the paint. This systematic process guarantees that your old car wrap actually vanishes, and what is left is the surface of a vehicle that is prepared to start a new life.
Step 3: Clean Up Any Adhesive Residue
No matter how careful the peeling process is when removing a vinyl car wrap, it is unlikely that a car wrap will leave no adhesive residue at all. Think of it as the specter of an old presence, a clingy reminder that now has to be exorcized. This is an important step, and any remaining adhesive will collect dirt and dust, and may make future detailing or a new wrap installation significantly harder.
The tool of choice in this case is a high quality automotive grade adhesive remover. Citrus-based solvents or isopropyl alcohol (IPA) products are widespread and effective. Do not use harsh chemicals such as paint thinner or gasoline, which may ruin your vehicle clear coat or base paint.
Start by spraying the adhesive remover liberally on the residue. Leave it to rest a few minutes and the solvent will do its magic and dissolve the bond of the adhesive. This will take time, depending on the kind and age of the adhesive, newer, less stubborn glue may dissolve in a short time, whereas old, cured residue may require more time or a second application. You will frequently find the adhesive start to melt or soften and become gooey.
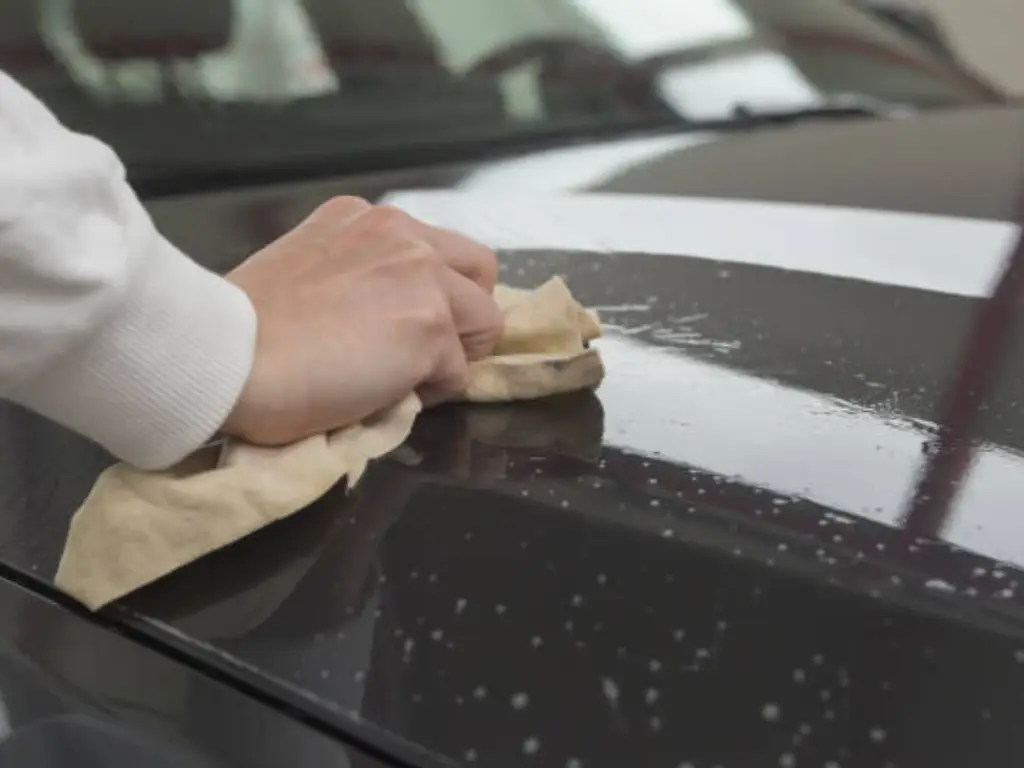
After softening, wipe the dissolved residue using a clean microfiber cloth. On more tenacious spots, a clean plastic razor blade, held at a very low angle, may be used to gently scrape the softened adhesive off the vehicle surface. Never use excessive force that can cause scratching of the paint. Fold your microfiber cloth regularly to reveal clean sides so that you do not end up spreading dissolved glue back to the car. This may have to be repeated several times with very heavy or extensive residue. The thing is patience, as with the peeling. Consider it a meticulous erasing, to show the real surface underneath. Make sure that all sticky residues are removed and the surface is completely smooth and clean.
Step 4: Post-Removal Care & Paint Protection
Your vehicle comes out of its transformation with the old vinyl car wrap removed and all the adhesive gone. This is the last step that is important in ensuring that the underlying paintwork is not only clean but also safeguarded and ready to face whatever is next. It is a time to think and refresh your car exterior.
Start by washing the whole car. This will eliminate any residual solvent, invisible adhesive dust and overall dirt that may have been collected during the car wrap removal process. Wash with a mild car wash shampoo and clean water, and thoroughly rinse and dry all surfaces.
After drying, examine the paintwork carefully. Search to see any slight hazing, small flaws, or even small adhesive ghosts that you may have overlooked. In case you discover some minor hazing or light scratches (which are frequently caused by the vinyl wrap itself with time, or improper removal), you may want to add a light paint correction or polishing stage. This is done by applying a mild abrasive polish using a dual-action polisher or even by hand to smooth out the clear coat and bring back its original shine. This is not always required but can be very helpful, particularly when the paint has been under vinyl wrap over a long period of time.
Lastly, you can apply a coat of paint protection. This may be a quality wax, a synthetic sealant or even a ceramic coating. This protective coating will not only make the paint glossy but also act as a shield against environmental pollutants, making the surface of the vehicle ready to face the next adventures. This considerate after-removal service makes sure that your car does not simply lose its old skin, but actually glows like new, prepared to accept whatever style or protection you decide to adopt next.
When to Consider Professional Help
Although the temptation of a successful DIY project is high, there are cases when the prudent thing to do when removing vehicle wraps is to hire the professionals. The process of removing a car wrap, especially an old or poorly maintained one, may occasionally turn into a Herculean task that even the most committed DIY enthusiast may not be able to handle. It is not a failure to know when to take a step back and get the help of an expert, but a prudent and caring thing to do to the vehicle.
Consider professional help if:
- The wrap is extremely old or degraded: In the event that the vinyl has become brittle, hard and is flaking off into millions of tiny pieces (commonly known as shattering), it will be a very time consuming and frustrating task to a DIYer. There are specialized tools and techniques that professionals use in such situations.
- Significant adhesive residue remains: In case you have tried your hardest and still have large areas of stubborn adhesive that will not come off, a professional detailer or wrap shop has access to industrial-strength solvents and tools (such as rubber eraser wheels) that can safely remove it without damaging the paint.
- You’re concerned about paint damage: If you are worried about damaging the paint on your car (perhaps there was some pre-existing damage such as chips or resprayed paint) or you are just not confident that you can remove the vinyl wrap without damaging the paint, then a professional will provide peace of mind and will usually guarantee their work.
- Time is a factor: A complete car wrap can require hours, sometimes a day or even two days to remove a large vehicle. A professional service can do the job efficiently in case you lack the time and patience.
Ready for a Fresh Look: Wrap, PPF, or Both?
The old car wrap is long gone and your car is fresh and ready to be transformed once again with its original paintwork shining. This is not a conclusion of a job, but a new canvas. Now you can redesign the aesthetic and protection of your car, selecting a range of high-tech solutions.
We know this transformation journey at Flexippf (https://www.flexippf.com/). Your car is not only a means of transport, it is a part of your personality, an investment that should be given the best. Do you see a dramatic color change wrap that turns heads, or the virtually invisible protection of Paint Protection Film (PPF)? We have premium options that are engineered to perform and last beautifully.
Our wraps are a unique chance to customize the appearance of your vehicle, as our color change wraps offer a level of aesthetic customization that is unmatched by anything else on the market, and you can change the entire appearance of your vehicle without the permanence and expense of a repaint. They provide a wide range of finishes, including glossy, elegant satins, and even interesting textures, all of which are meant to preserve your original paint but still make a statement.
Our PPF solutions are the best protection to those who value the factory finish of their vehicle. This self-healing film is optically clear, and provides an invisible shield against stone chips, swirl marks, bug splatters and environmental contaminants. It keeps your car in pristine condition and it keeps its resale value intact over the years. Think of the security of knowing that your paintwork is being watched over 24 hours a day, 365 days a year, without being noticed.
Maybe you want to have the best of both worlds? A lot of enthusiasts choose a bold vinyl wrap on the exposed panels, with the additional protection of PPF on the high-impact surfaces such as the front bumper, hood, and side mirrors. The combination of the two solutions offers not only unmatched style but also a strong defense.
Discover the wide variety of products of Flexippf today. We will deliver materials that are not only beautiful and long-lasting but also designed to be removed in the future as a car wrap, so the process is cleaner when you are ready to evolve again. Your car is prepared; are you prepared to its next masterpiece?
Read more: