Is DIY Car Wrapping Right for You? Unveiling the Benefits and Savings
Considering modifying your car’s appearance on a budget? A vinyl car wrap DIY project could be just what you are looking for. This art form combines art with economy and opens new horizons. Think of it as being able to change the look of an entire vehicle while sitting in a garage, with tools at your disposal rather than waiting with the keys and cash for someone to finish transforming your property into a piece of art. The most immediate appeal is without a doubt saving money. A professional wrap will cost an arm and leg. A DIY wrap allows you to budget exclusively to your needs.
Apart from the financial advantages, the gratifying aspect of customization is unparalleled. You won’t be boxed into mandatory choices, your imagination is the only limit. This is beyond just how things look, but rather gives you the ability to stamp a part of yourself on your ride. And let’s not forget the fun. Wrapping a car is a crafty, enjoyable, and rewarding pastime for those with an interest in handiwork. Moreover, you acquire a new skill, adding one more feather to the cap of a DIY enthusiast. Consider too how a quality vinyl wrap serves as a protective barrier against day-to-day damage to your original paint from road dirt and weather.
DIY car wrapping serves as more than just beauty enhancement. It encompasses the entire vehicle wrapping procedure and its improvements. Doing so increases the level of customization that can be achieved with the car.
Essential Tools and Materials for Your DIY Car Wrap Project
Planning to upgrade your car? Make sure you have everything you need before starting a DIY car wrap project, and here’s a list of everything you’ll need:
- Squeegee: This tool will become your best friend. It is useful for smoothing out bubbles in the vinyl film you’re applying as well as making the surface as smooth as it can be.
- Cutting Knife: Sometimes coming off with excess vinyl may have its perks, and a sharpened blade will take care of that for you.
- Heat Gun: It comes in handy with curvy sections of the panel as it softens the vinyl allowing it to take shape. Sections that are flat require minimal heating, whereas curves need a lot more heat to look good.
- Cleaning Solution: For proper adherence to the surface, you will need to ensure that the surface is cleaned beforehand.
- Isopropyl Alcohol: This will be useful for the final degreasing wipe that needs to be done before you begin applying anything.
- Microfiber Cloth: Handy when prepping and cleaning a surface as it’s soft and can let out lint.
- Tape Measure: The last thing you want during this process is to waste time and materials by applying the vinyl improperly. Precise cutting of the vinyl gives it proper placement, so ensure measuring is accurate to centimeter level.
- Cotton Gloves: Eliminating the risk of smudging while also keeping hands tidy, these gloves will have you set to get started.
Why Flexippf Vinyl is Your Smart Choice for DIY Car Wrapping

Just as important as learning how to apply a wrap is selecting the right vinyl. Even sites such as Amazon offer an staggering array of choices with each claiming results that look good on paper but fall short in reality. Let’s think of a range of types of vinyl.
| Vinyl Type | DIY Friendliness | Best For |
| Calendered Vinyl | Medium | Simple, flat section surfaces |
| Polymeric Vinyl | Medium | Moderate curves, general use |
| Cast Vinyl | High | Complex curves, professional results |
In this regard, the Flexippf one is rather clever buy especially for a semi-skilled person looking to do a wrap installation on his/her own. Why, because Flexippf does not work only on the beauty side. It is also designed to be useful and easy during the wrapping process. Flexippf vinyl is made from high quality materials sourced from BASF and Ashland, as well which increases their strength and color. It is intended to last after all and will protect the car’s paint as well as look good for years.
Flexippf also knows that for do it your self enthusiasts, conformability as a design feature is literally the be all and end all. Flexippf also offers superior passive the at that does not require preheating to become malleable enough to fit the shape of the vehicle. It can wrap around the most difficult curves like those around hood ornaments. Another big advantage of Flexippf is the special feature of air release. As the name suggests, it is able to release air. This system helps in the application of the wrap by getting rid of air bubbles that often appear on the surface and make a nightmare. Even the novice wrappers will be able to have decent results with this trick up fool.
Plus, there’s no denying that Flexippf provides a chance to express the user’s individuality through its various textures, colours and finishes.
From matte black to vivid gloss and everything in between, Flexippf offers colors that will make your automotive vision reality. With Flexippf, you are provided with the confidence that comes when using a material engineered to make DIY car wrapping not only achievable, but effortless and rewarding. What separates Flexippf from the rest is their ability to handle logos and intricate designs by the vinyl’s detailed finesse. To check the entire Flexippf collection and find the ultimate vinyl to transform your automotive vision, visit https://www.flexippf.com/.
Preparation is Key: Step-by-Step Car Prep for a Flawless Wrap

The hidden advantage of a successful car wrap isn’t just skill; it is in the detail. It’s like building a strong base for a masterful structure – if you neglect it, the entire thing could fall apart. With that said, here’s a complete guide to prepping a car for an ideal vinyl wrap:
Step 1: Thorough Car Wash – The Canvas Cleansing
As the first step, start by washing the car properly. The first step should not include just splashing water on the vehicle, instead, it should include proper washing as to get rid of mold and moisture. Start by utilizing professional car cleaning products designed to get rid of all dirt, grease, and other build residues. Make sure to scrub stubborn areas with edges and corners to remove every hint of dirt. If there are some stubborn residues, you may require a specialized tar and adhesive cleaner. after scrubbing thoroughly, rinse the car using clean water. Scrubbing the car should be done in a way that no hint of soap is there, otherwise, it will ensure the vinyl does not stick with the car. To prevent water from getting stuck in the seams which makes it difficult to wrap the car later, completely dry out the car.
Step 2: Wax and Grease Removal – Stripping the Barriers
Products that are wax, grease, and silicone based are enemy number one for vinyl. These products form an invisible barrier that wraps everything in the area, preventing the paint from sticking properly. Use a wax and grease remover or isopropyl alcohol and place it on all surfaces that you desire to wrap. Afterwards, wipe everything from the surface with clean microfiber cloths while frequently changing the cloths so you do not redeposit contaminants. This step guarantees the surface will be pristine and allow the vinyl to be placed without problems.
Step 3: Paint Imperfection Check & Repair – Smoothing the Surface
Use good lighting when observing your paint job. See any scratches, swirl marks, or other small imperfections, especially on the fender and hood? Vinyl wraps are good at transforming the car, but they are not magic. They will show and not hide underlying problems. For the small bits, use a polishing compound and for deeper ones it may be required to get professional help. Have the idea that a smooth vehicle will result in a smooth wrap. For parts surfaces that require more adhesion, a primer can be used.
Step 4: Disassembly of Removable Parts – Simplifying the Process
There are usually handles that are of no importance since wrapping can be done without them. Such handles can be: door handles, side mirrors, headlights of the vehicle. Consult the manual of your vehicle for the best way to dismount these components. If other components are removed, wrapping is simplified, and hidden edges are covered with the vinyl at the back surface of the parts giving the appearance of a more professional design.
Step 5: Clean and Controlled Environment – The Ideal Workshop
It is advisable to choose a working area away from sunlight and wind which helps keep the working area clean. The temperature of the environment matters also; having a moderate temperature between 21 and 27 degrees Celsius allows for the best working conditions with the vinyl and any glue. Dust is the greatest enemy of perfect wraps. Try to reduce the amount of dust in the air by cleaning the garage or workspace to be used in advance. After thorough cleaning and organizing of the workspace, the accumulated dirt can allow users to achieve a high-quality DIY wrap.
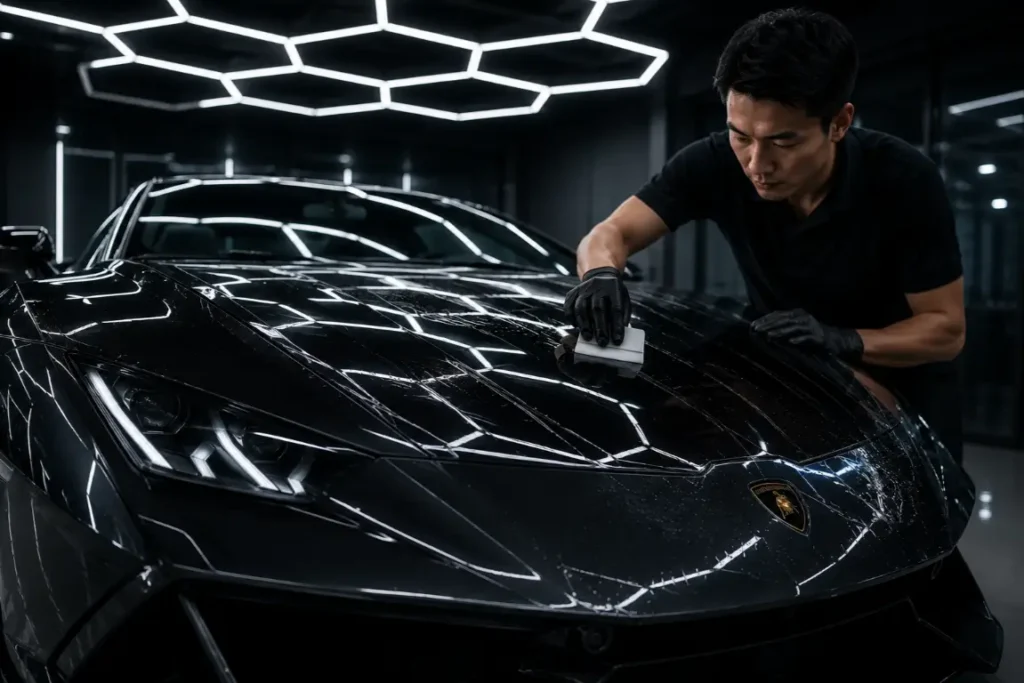
The Art of Application: Mastering Vinyl Wrapping Techniques
Having finalized prep work, the next stage is applying the vinyl. Optimally, it combines patience, skill, and fine motor control to transform your vehicle.
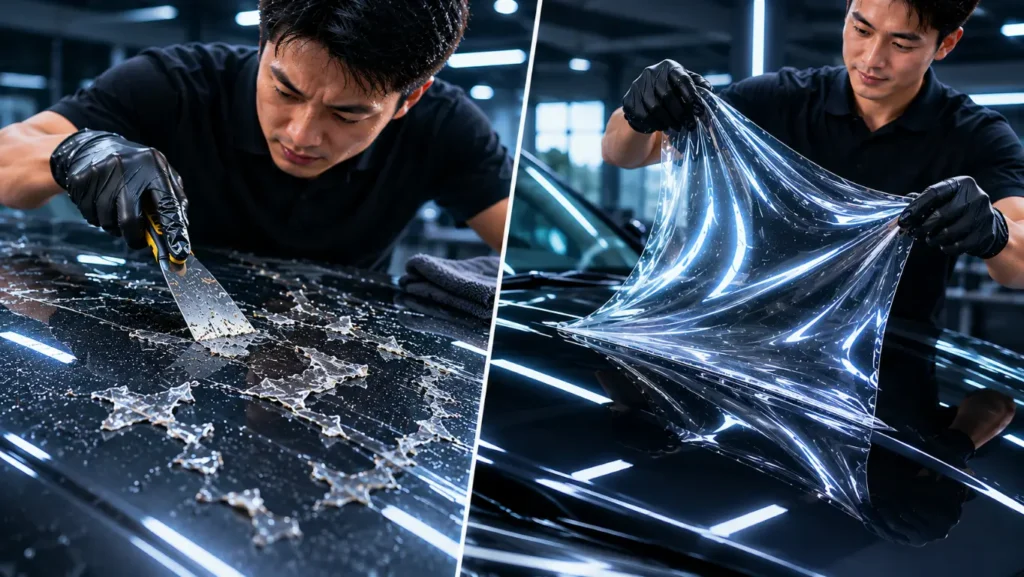
Step 1: Cutting the Vinyl – Precision and Planning
Before even lifting the backing paper, the order of cutting must be sharp. Take a measurement of each panel of the car, then add a few inches to each measurement. This added material aids in movement and edge wrapping. On a clean flat area, roll out your car vinyl and using a tape measure, guide the placement of the cuts via your sharp blade utility knife. Don’t forget to measure twice, cut once. Getting this accurate means less waste and makes the finished product look better instead of unprofessionally looking. Make sure you have the proper amount of film to cut.
Step 2: Dry vs. Wet Application – Choosing Your Method
A centuries-old dispute in the vinyl wrapping community: wet or dry? Each has its voters, based on what skill level and complexity of the surface being worked on.
| Feature | Dry Application | Wet Application |
| Complexity | Simpler, faster | More complex, requires practice |
| Surfaces | Flat section or gently curved surfaces | Complex curves, large panels |
| Adhesion | Immediate, strong bond | Initial tack reduced, repositionable |
| Bubble Control | Higher risk of bubbles, less forgiving | Easier to manage bubbles, more forgiving |
| Tools | Squeegee, heat gun | Squeegee, heat gun, spray bottle with application fluid |
| Best For | Beginners on simpler projects, quick application | Professionals, complex projects, intricate designs |

1. Dry Application: For the Impatient and the Flat Surfaces
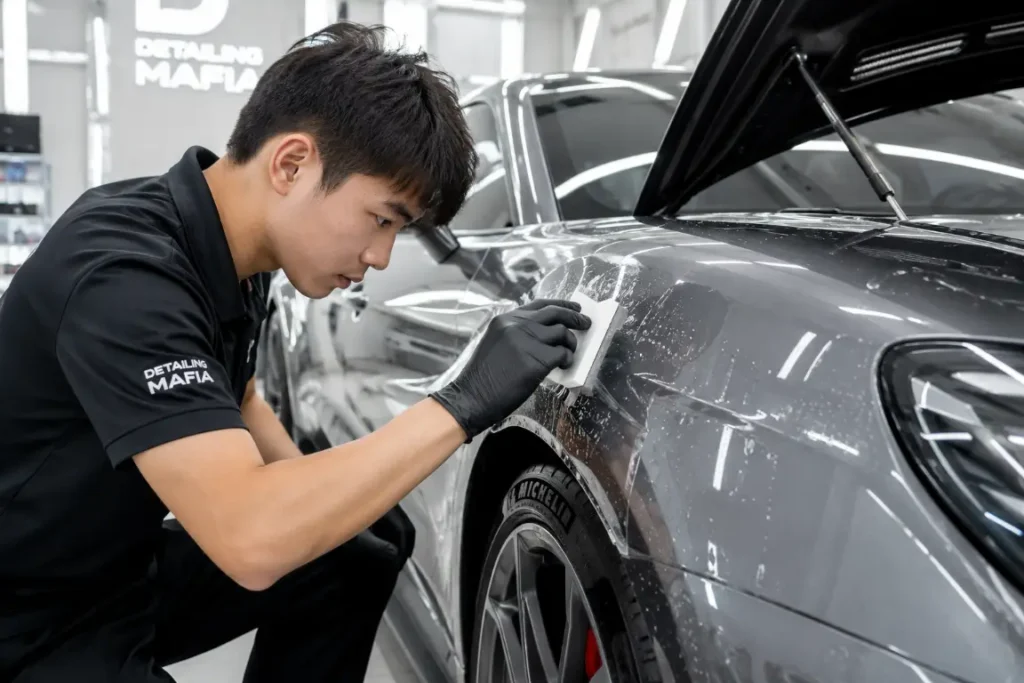
This approach is preferred by beginners because it is simple and can be accomplished in small parts. Using your hands, peel a part of the vinyl backing paper away from the rest and place it on the clean car panel. Then, with the squeegee, press down to the center of the vinyl first. Gradually push outwards and smooth the vinyl down, removing air as you work. The heat gun becomes your ally for curves and edges.
If you want the vinyl to more easily conform to contours, use a small amount of heat to soften the vinyl. Slowly work in small sections while applying heat, gradually peeling back the backing and squeegeeing in turns. Dry application is moderately quick, effortless to start, and gives a strong initial bond, however, it is not user friendly. Mistakes can easily be made with precision. This method is very useful on flatter surfaces and smaller panels where maneuverability is not an issue.
2. Wet Application: For Complex Curves and a Second Chance
When it comes to the complex curves and bigger panels of your vehicle, the wet method has one basic but vital benefit – forgiveness. Prepare a slip solution (generally water with a couple drops of dish soap or application fluid) in a spray pump. Generously spray the adhesive side of the vinyl along with the panel of the car. The liquid assists in repositioning the vinyl easily by disabling the adhesive and therefore realigning large portions of vehicle wraps becomes extremely easy. Set the vinyl into place, then squeegee the solution out from the middle towards the edges.
The wet method greatly decreases the chances of trapped air bubbles because the liquid help with them. Gently warm the vinyl with a heat gun to speed up evaporization of the slip solution while encouraging adhesion. The trick is to not apply too much heat too quickly, as it has the potential to cause damage. While wet applications take a little more time and can be a little challenging, it surely is the best method to get perfect results on intricate shapes.
Troubleshooting Common DIY Car Wrap Issues
Despite putting in a lot of effort and perfecting your techniques, DIY car wrapping is still staggering. Troubleshooting common problems is the best way to approach these uncertainties and ensure you get the finish as close to a professional’s as possible.
- Bubbles: These annoying irregular pockets of air are a universal problem when it comes to car wrapping. Usually, they appear during application due to a failure of the squeegee tool. They need to be dealt with without wasting any time. If bubbles are formed, perhaps the best solution would be to do a re-squeegee on the area of concern; however, while squeegeeing, one must firmly apply force as well as apply pressure in an outward direction. In order to get rid of stubborn bubbles, gently prick them with a pin or pincer and do some squeegeeing to get rid of the air trapped inside.
- Wrinkles: Forced stretching of vinyl or shaping of heated vinyl without proper margins is what leads to a wrinkle. When wrinkles show up, get your heat gun and apply some heat to the vinyl. Surrender the wrinkled portion and gently lift it prior to repositioning and do some re-squeegeeing while maintaining even tension. Caution here is moderation. Once again, take your time and ensure that no unwanted pieces of fabric are joined in the wrong spots.
- Lifting Edges: These premature lifting pieces, among other things, can make wrapping a nightmare. This is true, particularly for areas that have curves or those that are not cleaned properly. For persistent issues, consider covering edges with a reinforcing edge piece to bring the possibility of gripping and the damaging elements down.
- Tears or Rips: Sometimes, tears are unavoidable, especially if a sharp blade is used or if vinyl is over-stretched. Some small tears can be repaired using a piece of vinyl overlap blended with heat. In cases of larger rips, it is generally better to replace the fender or hood panel section to achieve a more professional looking result.
- Adhesive Residue: If vinyl is left in place for long periods of time, the adhesive becomes very hard and removing it can become difficult. Specialized adhesive removers are the way to go. Removers need to be applied and left to dwell for a short time, afterwards, it needs to be wiped down with a microfiber cloth. Always test removers in an inconspicuous area first so you do not damage the paint on your car.
Long-Term Care: Maintaining Your Car Wrap for Years to Come

Installing a DIY wrap on your car is an effective way to protect and improve the appearance of your car, but suffers from its own set of issues. Protect it by performing some necessary maintenance and it will look pristine for years to come.
- Regular Cleaning: Complete a normal maintenance wash for your wrapped vehicle, by washing it with a soft sponge or microfiber cloth and neutral car wash soap. Automatic washes and harsh scrubbing brushes should be avoided at all costs, as they would scratch or remove the edges of the vinyl. Treat your wrap with care.
- Avoid Harsh Chemicals: Harsh cleaners, solvents, and chemicals are big no-nos as they can damage the car wrap by peeling it off or making it lose its overall appeal. Centrally focus on pH-neutral car wash soap designed for use on wrapped cars instead
- Waxing or Coating (Optional but Recommended): Adding a coat of wax or using a very specific vinyl wrapping coating might not be necessary, but could allow the wrap to last longer. Covering the wrap in these products can help block UV rays and pollution while also enabling the car to be cleaned with more ease.
- Avoid Prolonged Sun Exposure: Wrapping the car with vinyl does a good job of protecting it, but does leave the paint underneath exposed. Keeping the car in the shade, or covering it up during the peak of sun hours is highly recommended, and will not allow it to become faded.
- Prompt Stain Removal: Allowing bird excrement, tree sap, or bug splashes to sit around won’t just make things look bad, they can actually permanently damage vinyl. The combination of a soft cloth and a gentle cleaner is effective in removing stains. Gently scrubbing right away can ensure any damage is avoided can help maintain your wrap in good condition so you will not have to deal with excess staining.
DIY Car Wrapping vs. Professional Services: Making the Right Decision
The issue of DIY or professional help is critical when it comes to a car wrap. Each option has its pros and cons and the “right” choice depends on your situation and priorities. Do you intend to apply knifeless tape for detailed designs, or would you rather have a professional work complex areas?
| Feature | DIY Car Wrapping | Professional Car Wrapping |
| Cost | Significantly Lower | Considerably Higher |
| Personalization | Maximum Control, Limitless Options | Limited to Shop’s Offerings, Less Direct Control |
| Time & Effort | Requires Significant Time and Physical Effort | Saves Time and Effort, Hands-Off Approach |
| Skill Level | Requires Learning Curve, Practice, Manual Dexterity | Professional Expertise, Guaranteed Skill |
| Quality Control | Dependent on Your Skill, Potential for Mistakes | High Quality Finish, Professional Standards |
| Durability | Can be Excellent with Quality Vinyl & Technique | Typically Excellent, Premium Materials & Application |
| Warranty/Support | Limited to Material Warranty | Often Includes Installation Warranty and Support |
| Learning Curve | Steeper Learning Curve | No Learning Curve |
| Satisfaction | High Sense of Accomplishment, DIY Pride | Convenience, Assurance of Quality |
| Best For | Budget-Conscious, DIY Enthusiasts, Hands-On Individuals | Time-Constrained, Quality-Focused, Less Hands-On Inclined |
How to Choose:
- Budget: If that’s your primary concern, DIY is the clear winner.
- Skill & Time: Consider how good you are at DIY work, and how much of your free time you have available. Are you hands on and ready to dedicate some time to learning the art of vinyl wrap installation?
- Desired Quality: For those who wish to achieve perfection and are sure of getting it done, professional services will most certainly assure desired outcomes.
- Personalization vs. Convenience: Value personalized attention and want to put your stamp on things? Go DIY. Want to sit back, relax, and have a professional wrap the vehicle for you? Use a pro.
Conclusion: Embrace the DIY Car Wrap Revolution and Transform Your Ride!

DIY car wrapping is more than just a trend; it’s a revolution in automotive aesthetics, placing the power of transformation directly into the hands of car enthusiasts. It’s about taking control, saving money, and imbuing your vehicle with a personal touch that no professional shop can replicate. The benefits extend beyond mere cosmetic enhancement, offering paint protection, skill acquisition, and the profound satisfaction of a job well done, entirely by your own hands.
As vinyl technology advances and DIY resources become ever more accessible, the barrier to entry continues to lower. So, are you ready to join the DIY car wrap revolution? Embrace the challenge, unleash your creativity, and transform your ride into a rolling testament to your own ingenuity and style. The open road awaits, now paved with your personal expression, ready for great ways to show off your newly wrapped car.